Change lab template settings to customized advanced behaviors.
A lab template is a virtual training environment consisting of one or more virtual machines, that is, operating system images. Lab templates can also include additional non-visual resources like database servers and ports. Once created and published, lab templates are used by classes to create dedicated copies of the lab environment for each class participant (i.e., instructors and students).
After creating a new lab template, the lab template details can be modified to customize the advanced behavior. Some of these options can be defined at creation time, but many of them can only be modified once the lab template exists. Also, most of these details are only available to change if the lab template State is "Stopped".
Open the Lab Template Details

To open a lab template, select the desired template name from the Lab Templates list. This provides access to features for starting and stopping the template, publishing the template, editing template details, identifying class usages, and editing lab template component items.
To start the lab template so that you can modify the content of the lab images, refer to Customizing Lab Images. To prepare the lab template so it can be used in classes, refer to Publishing a Lab Template.
Basic Lab Template Information

During lab template creation, basic lab template details are entered while using the Lab Template Wizard. These include the name, description, labels, and permission settings. Once the template is created, use Lab Template Details to modify these values.
To modify the name or description, select Edit (represented by a pencil icon) next to the desired property from Lab Template Details. Then, to save any changes you've made, select Save (represented by a green checkmark). To revert back to the previous setting, select Discard (represented by a red "X" icon).
To change the labels attached to this lab template, select Edit (represented by a pencil icon) next to the existing list of lab template labels. Then, use Assign Labels to adjust which labels are attached to the current template. To return back to Lab Template Details, select Close next to Current Labels.
To change lab template permissions, you can simply select the appropriate permission level. All of these changes are saved automatically as you make them.
Inactivity Timeout
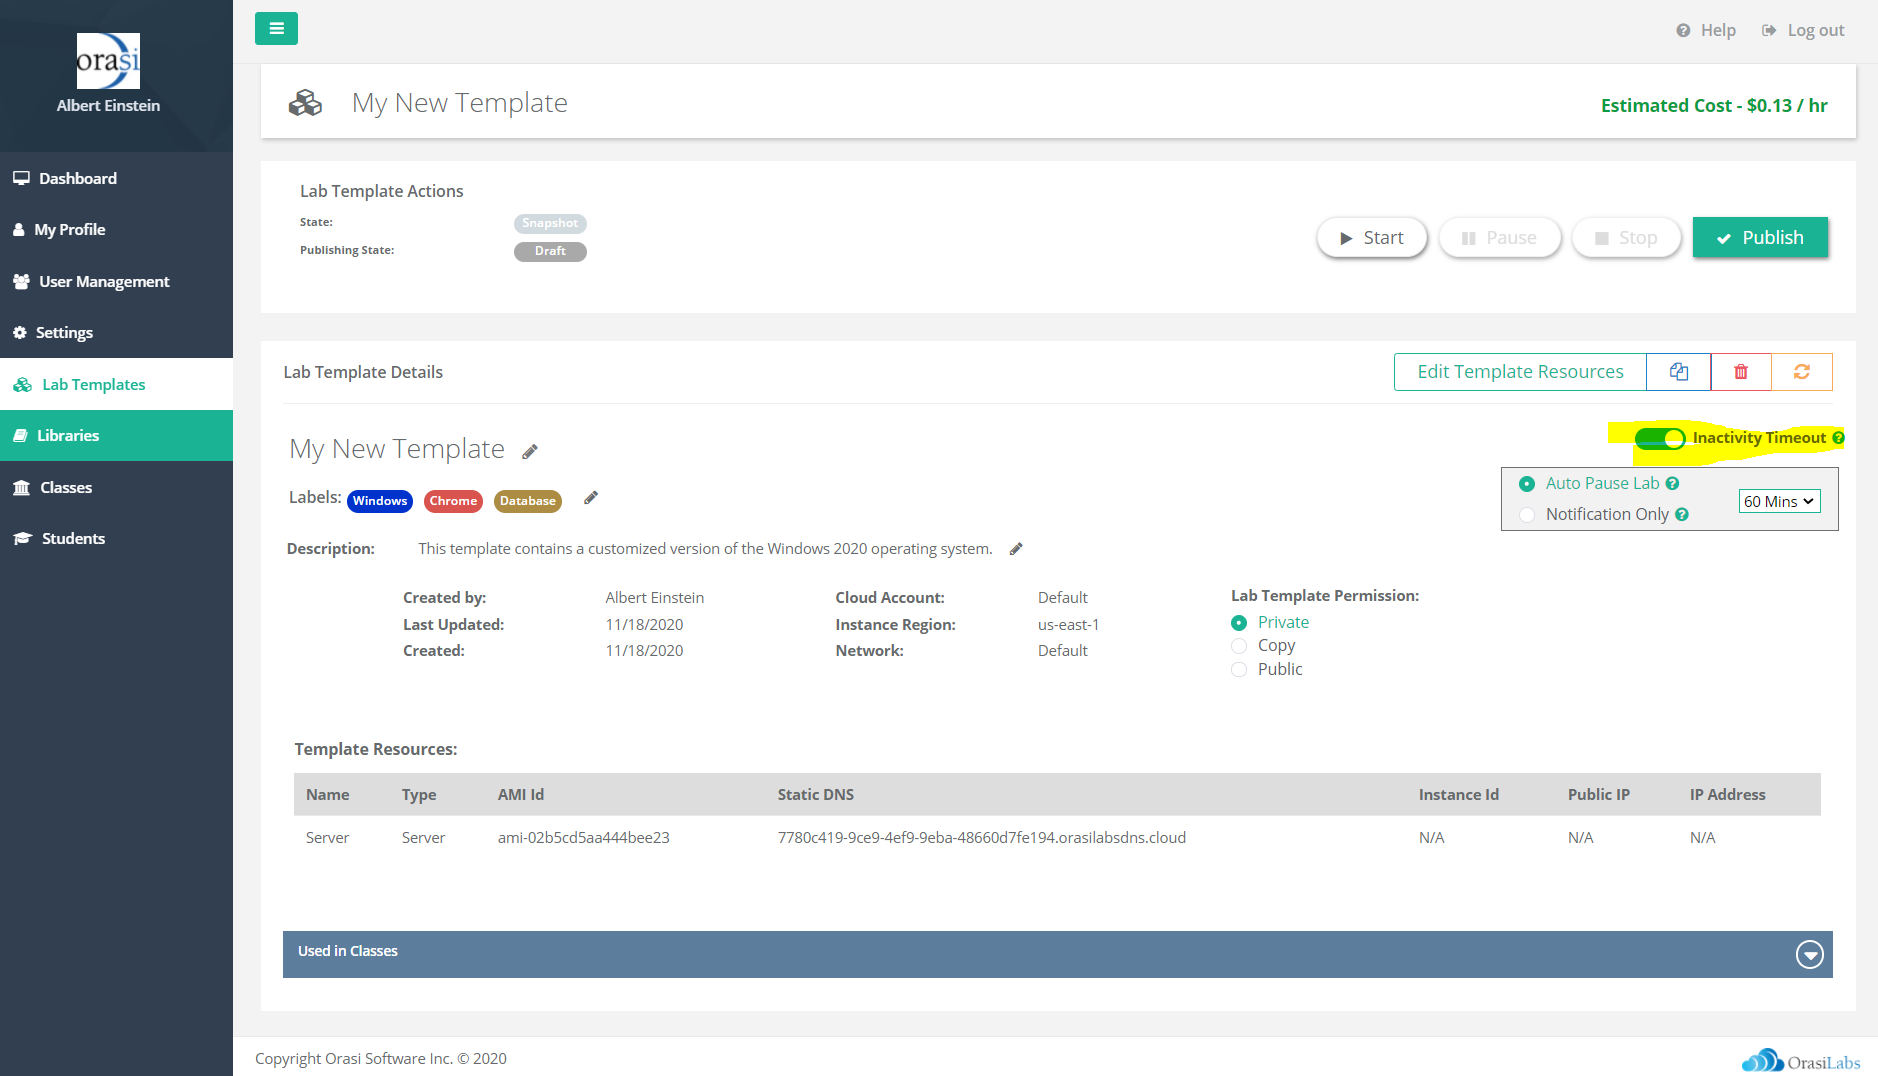
One setting that you can't specify when using the Lab Template Wizard is the inactivity timeout. The inactivity timeout controls how long a lab template and class labs will continue running without any noticeable user activity. This feature prevents the instructor from accumulating cloud charges from idle labs.
By default, the inactivity timeout is set to 60 minutes. This means that 60 minutes after any user activity is detected, the lab image will pause on its own. In most cases, the default value is sufficient. However, you may wish to decrease this setting to minimize costs. On the other hand, you may wish to keep labs running longer so that students can continue to work at their own convenience without having to wait for a lab to restart.
Once labs are auto-paused, they will also auto-stop after two days of being paused.
Please refer to the article Lab Template Inactivity Timeout Settings for complete details.
Lab Template Design
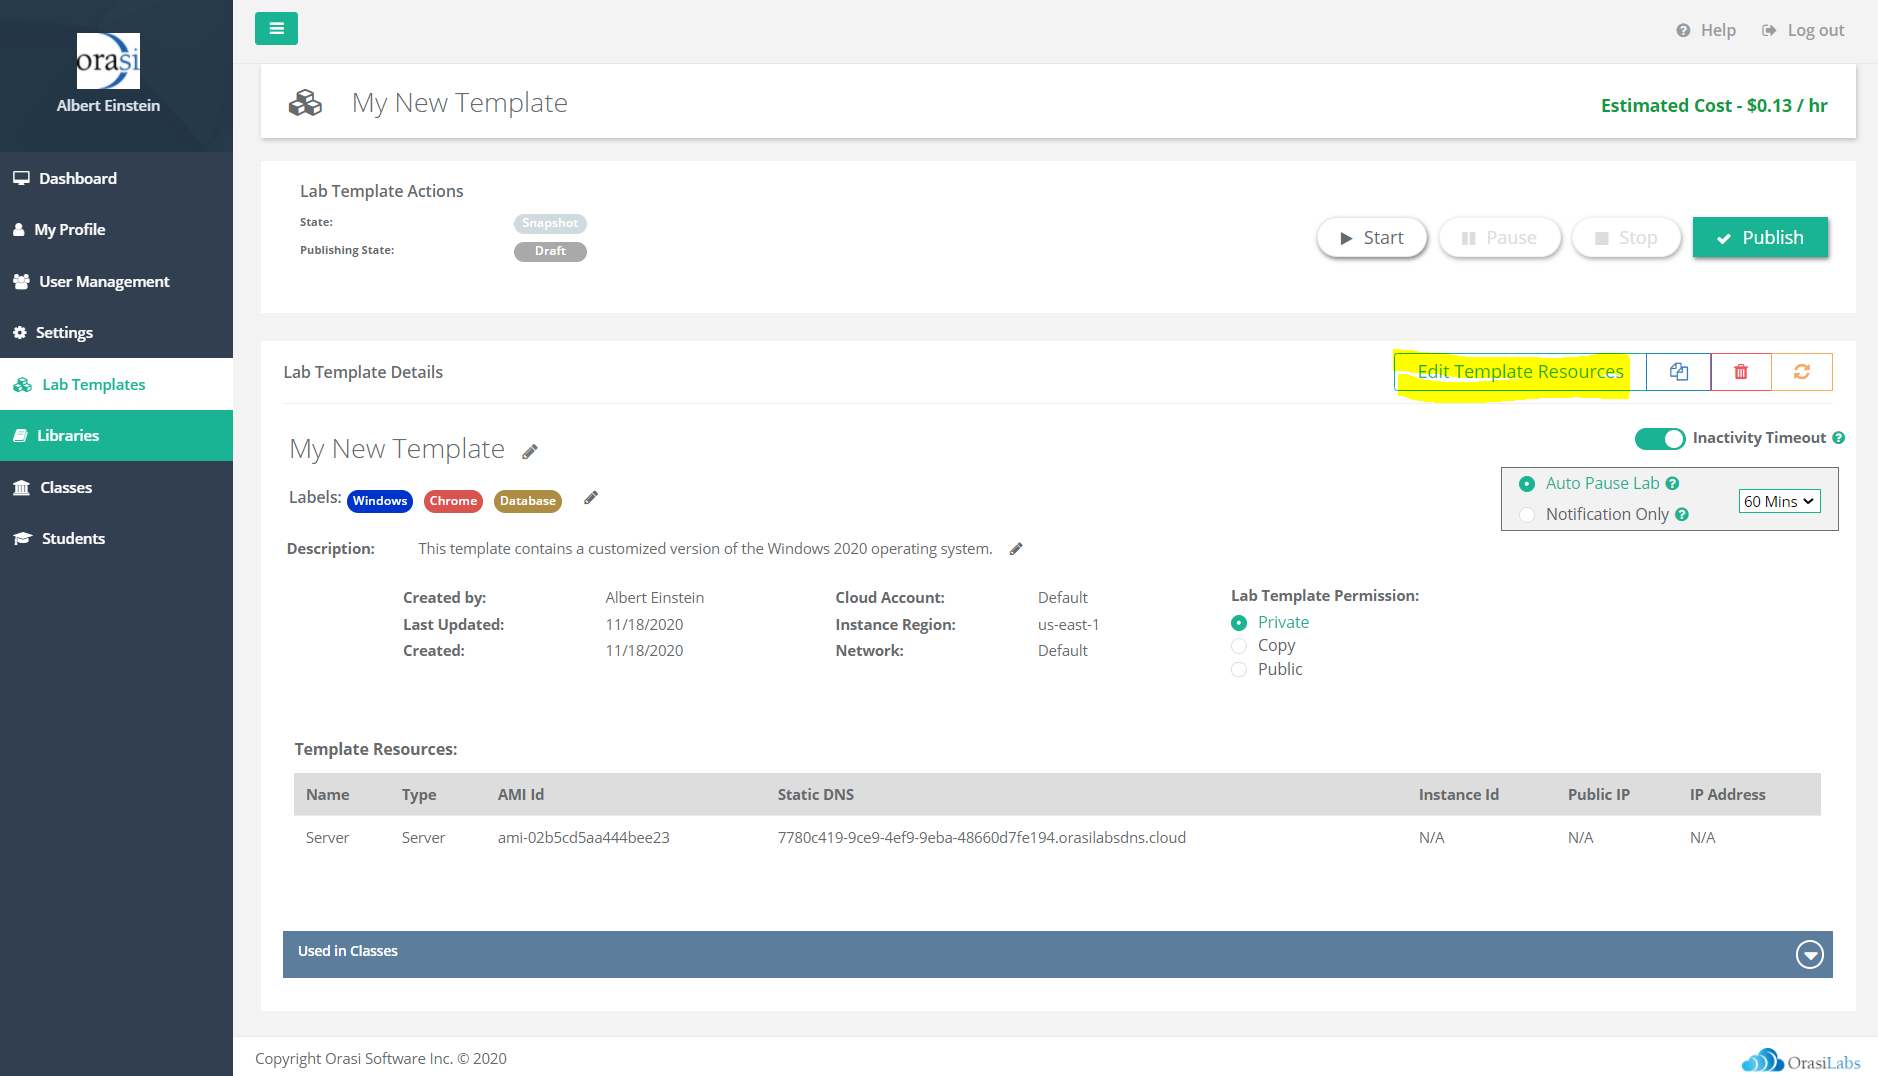
You can also select Edit Template Resources to invoke the Lab Template Designer in order to modify the components within a lab template. This might include adding or removing servers, adding or removing databases, adding or removing external port resources, or changing component configuration and connection details.
When adding or removing resources using the Lab Template Designer, be sure to select Save to keep any changes or Reset to discard them. To return to the property-level view, select View Details from the Lab Template Designer.
For a complete explanation of the Lab Template Designer options, refer to Creating a Lab Template with the Lab Template Designer.
Used in Classes

If a lab template has been attached to one or more classes, the Used in Classes list will show which classes have used it and in which role it was used. If the lab template is not currently attached to any classes, the text "Not used in any Classes" will appear. For informational purposes, it will also show the class start and end dates as well as the current combined lab status.
To expand or collapse the list, select anywhere on the Used in Classes banner.
Template Resources
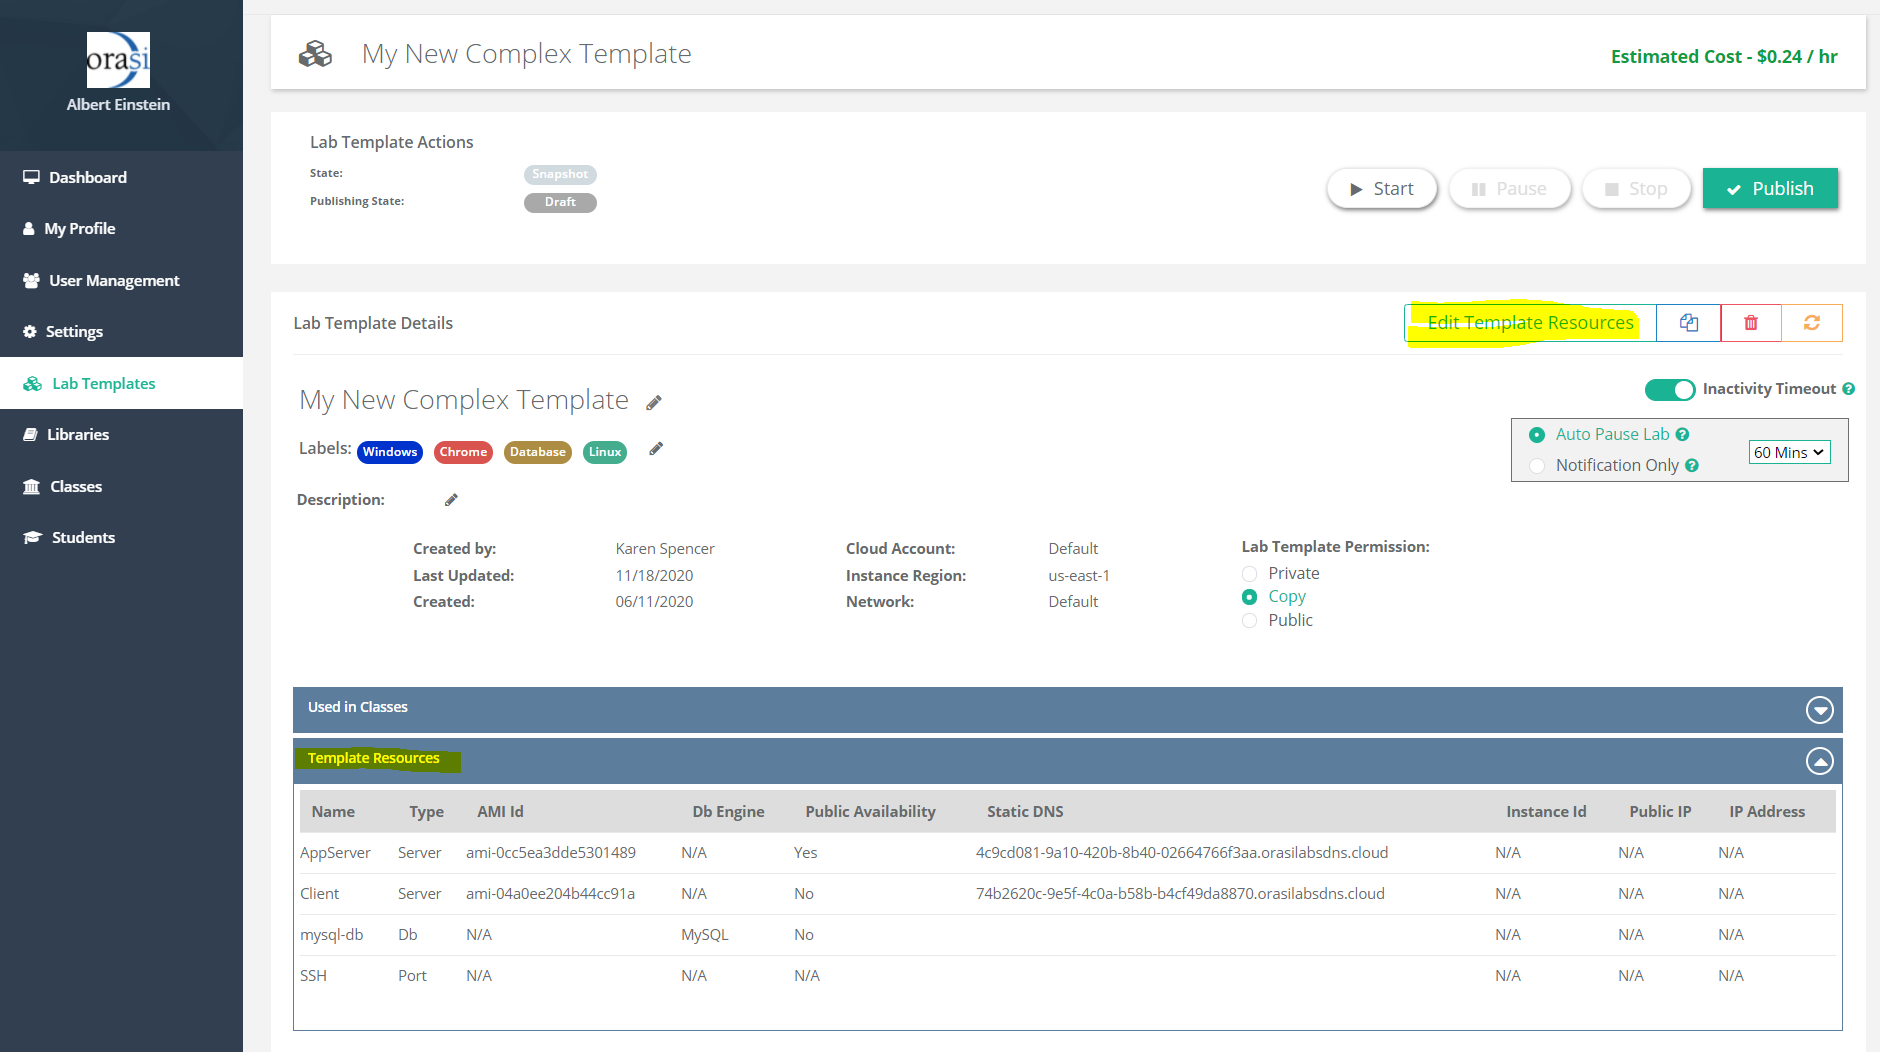
The Template Resources list will show all resources used in the lab template. To expand or collapse the list, select anywhere on the Template Resources banner.
You can also modify the configuration and connection properties for the lab template resources. These are the detailed properties that determine the performance characteristics, connection credentials, and run-time settings for server resources.
To change properties for a resource, select Edit Template Resources to open the Lab Template Designer. Here, each of the resources will be shown visually and can be edited.
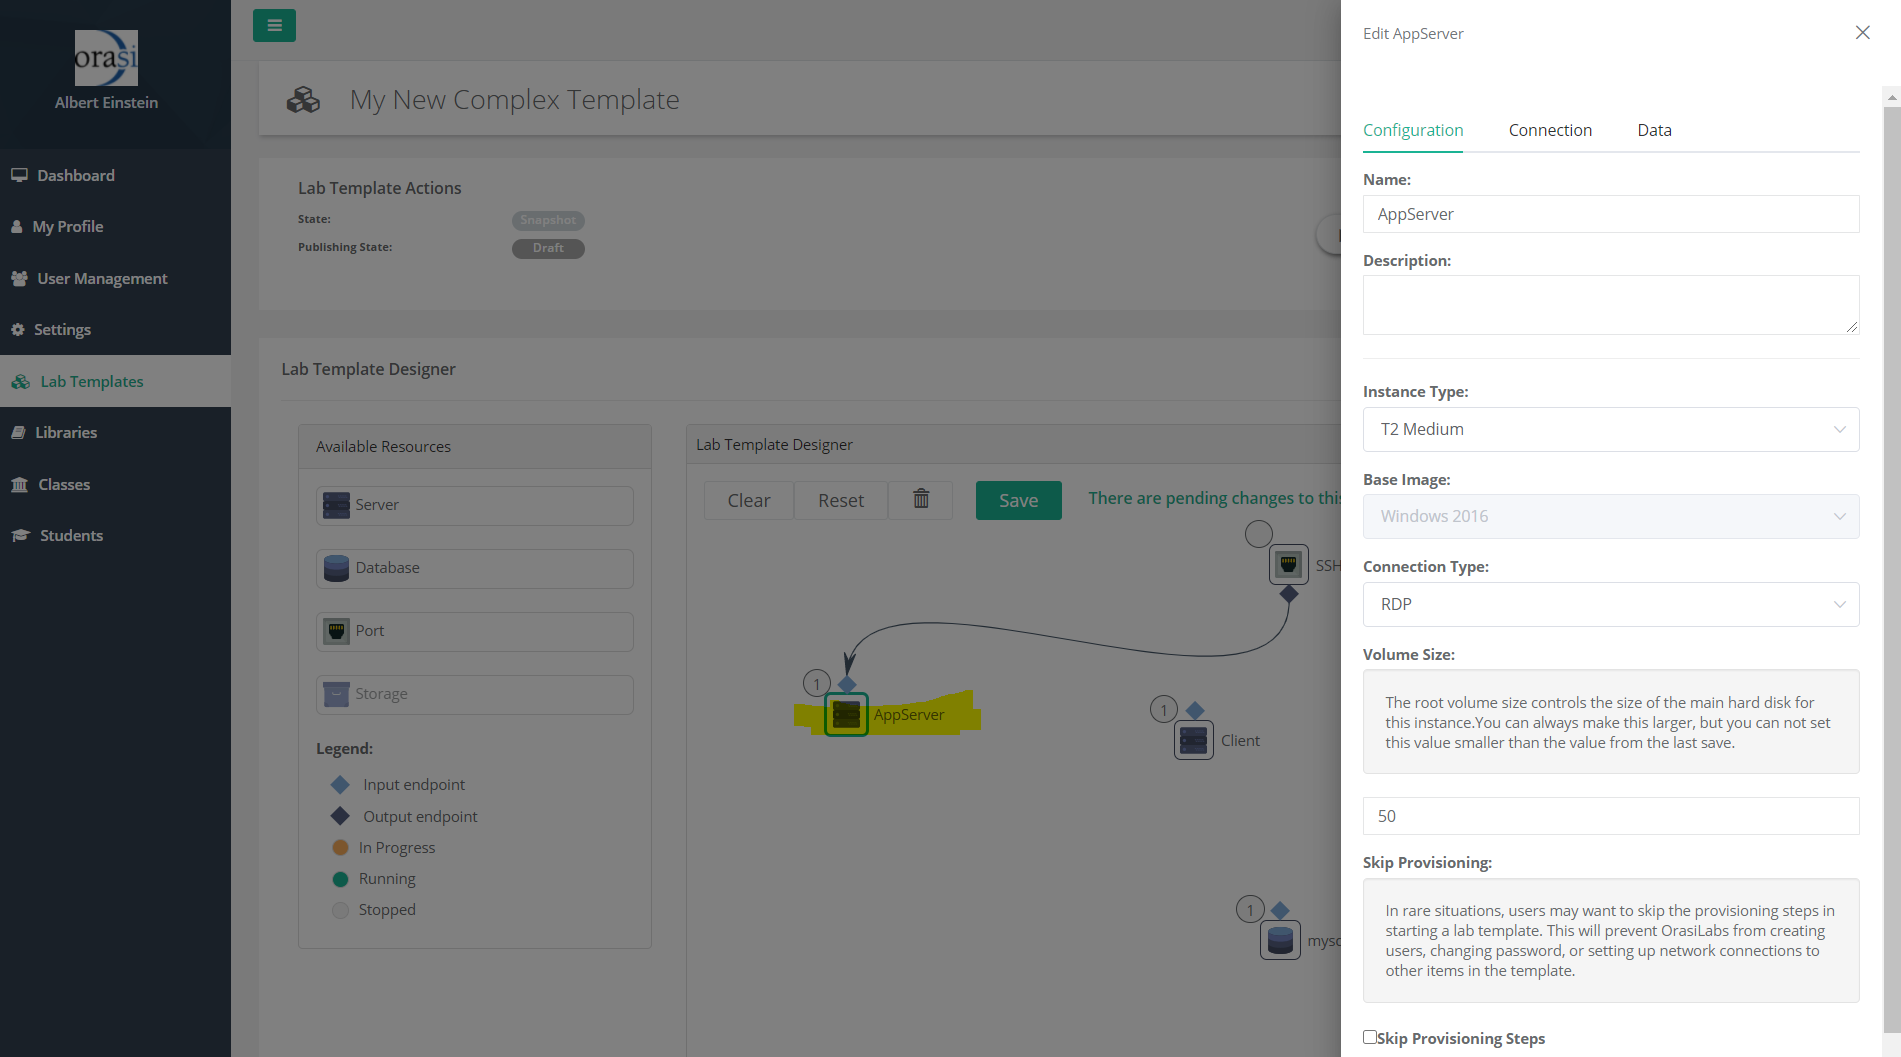
Once in the Lab Template Designer, double-click the resource, and the Configuration options will open to the right. Here you change the resource name and description. You can also specify the size of the main storage volume. Set the volume size to a whole number of gigabytes (GB). Volume sizes can be increased at any time but can never be decreased once changes are saved.
In rare cases, you might also want to set this component to skip the default provisioning steps when the lab template is started. This disables some of the native OrasiLabs functionality and is not often desired. However, if you are using a persistent Amazon resource then provisioning may not be necessary.

Select the Connection options to change how lab participants will connect to this resource. These settings are automatically generated when the lab template is created and there is normally no reason to change them.
However, if necessary, you can choose to identify a specific username with which to connect. You might also specify a static password rather than allowing the default behavior where OrasiLabs generates participant-specific passwords. Finally, you can also use these options to determine the SSH authentication method and to download private keys in order to enable external Linux connections.

Select the Data options to configure what displays in the Show Custom Data option (represented by a lower case "i" on the lab thumbnail when it is running) for the lab template resource. By default, the full connection credentials are displayed, including the lab IP address, login username, and login password. You can choose to hide this information by deselecting the Expose connection credentials in custom data? option.
Additional custom data can be added by entering a key value pair and selecting Add Custom Data. This is often used to provide website URLs or command definitions that a student might need during a class. The student could copy the relevant information and paste it into the lab environment, as needed. Custom data key pairs that were added previously can be removed by selecting Delete (represented by a red "X" icon) next to the custom data you wish to remove.
NOTE: The Connections and Data options are only applicable to server resources and therefore will not be available for Port and Database resources.
Once you've made all of the desired changes to the lab template resources in the Lab Template Designer, select View Details to return to Lab Template Details.
Where to go from here...
Was this article helpful?
That’s Great!
Thank you for your feedback
Sorry! We couldn't be helpful
Thank you for your feedback
Feedback sent
We appreciate your effort and will try to fix the article