Make changes to lab templates by starting and accessing the resources.
Lab templates are usages of base images. However, these base images need to be customized for specific scenarios under which the lab templates will be used. For example, a class that will teach how to use an application might want the application installed and settings configured before class. Classes that use databases might need seed objects populated in the database beforehand so that students can manipulate the existing data.
Customizing a lab template is easy. You need only start the image and access the resources. Once logged in, you can make changes to the operating systems and/or modify data in the databases. You can even upload files and configure user-specific settings. Then, after your desired customization is complete, you simply save the lab template so that all subsequent usages of the template will inherit the changes.
Lab templates can also be used as temporary run-time environments as well. You can start lab templates in much the same manner to access the resources but then simply choose to discard the changes when you're finished.
Start the Lab Template

In order to customize a lab template, you must first open the lab template definition. From the Lab Templates list, select the template name that you'd like to customize.

From the lab template details, select Start to provision and run the lab environment. OrasiLabs will create all of the necessary cloud resources and start them. Depending on the number and type of resources, this can take anywhere from a few minutes to an hour.

OrasiLabs will display progress messages as provisioning milestones are reached. The estimated time remaining is calculated based on the number and type of resources in the lab template. In general, server components start much more quickly than database components and components with smaller memory footprints start more quickly than larger ones.
Access the Lab Template Components
Resize Lab Thumbnails
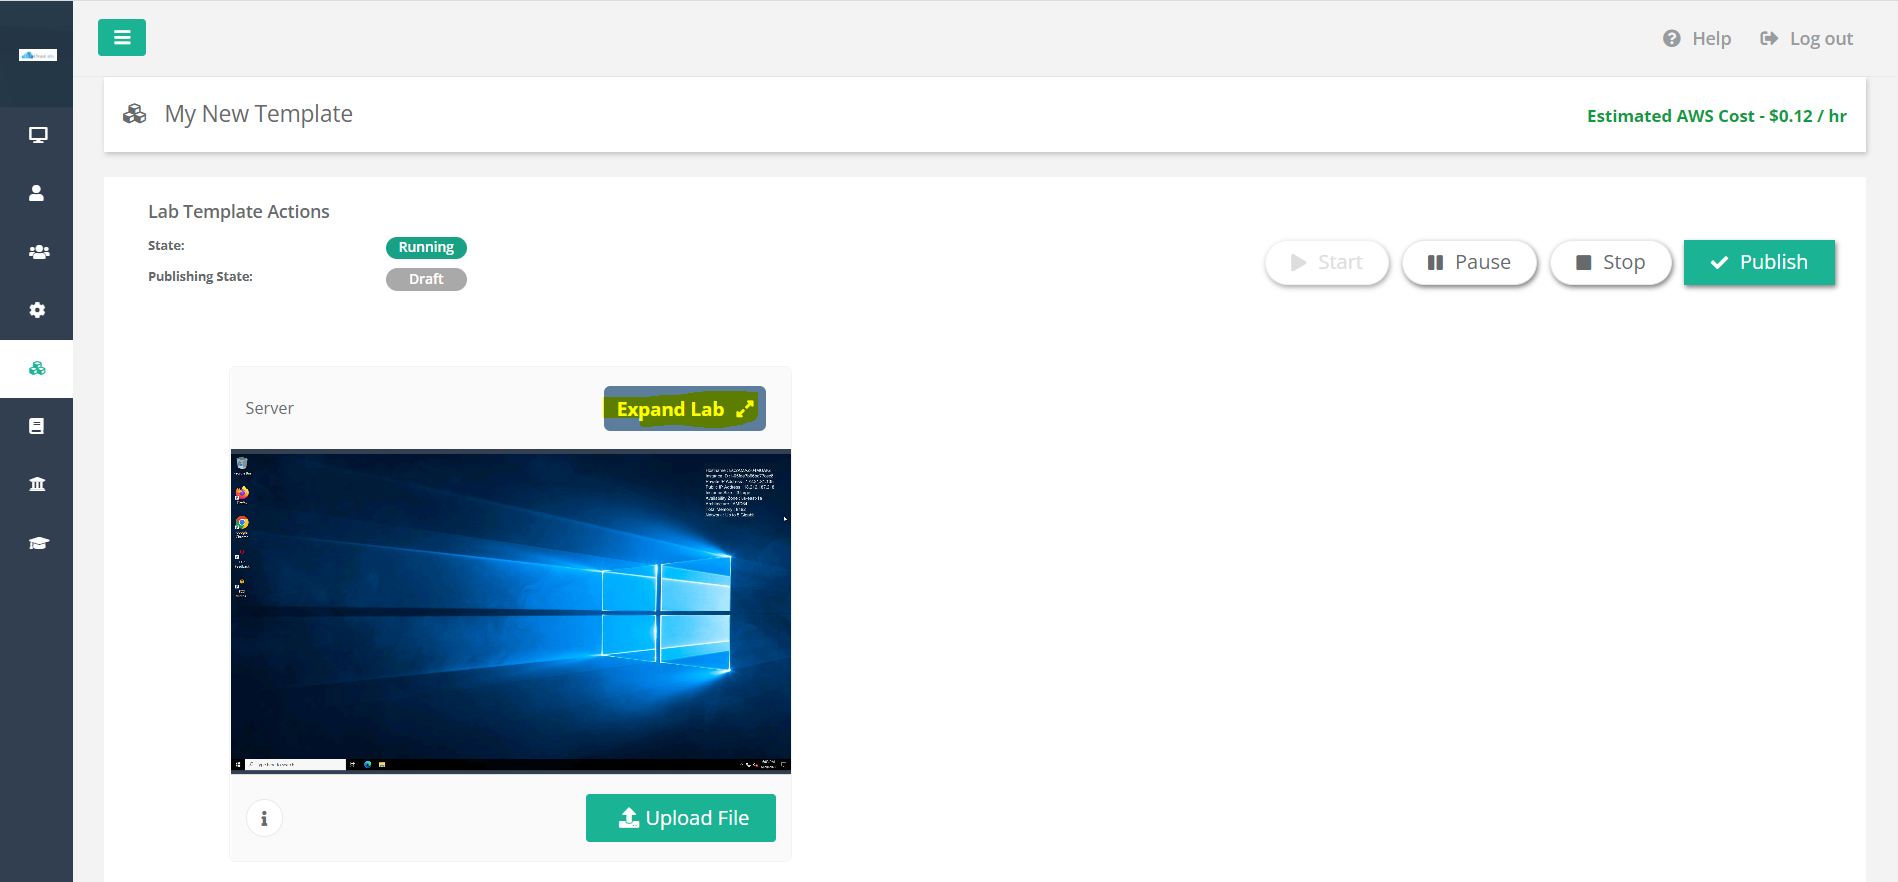
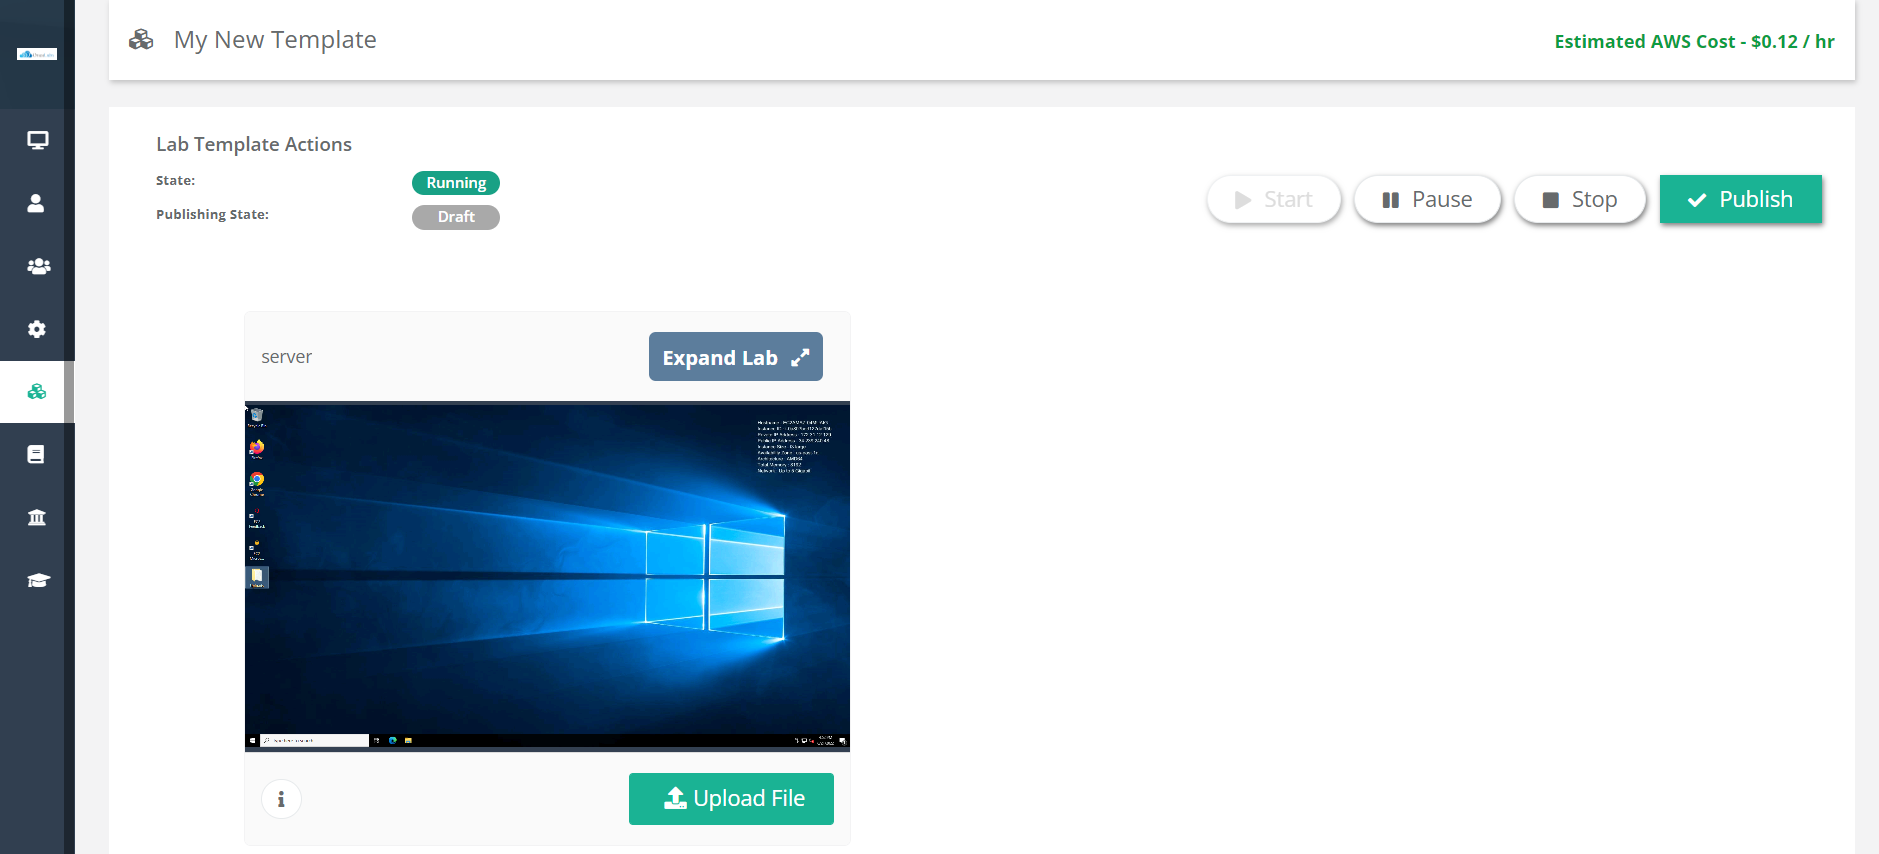
Once all of the lab template resources are started and available, thumbnail images for each server will be displayed below the template name. You can expand a thumbnail for a server resource by selecting Expand Lab. Once expanded, you can further expand by selecting Full Screen (represented as a four-headed arrow).
Non-visual database resources can only be accessed from a server resource and therefore will display connection credentials instead of a thumbnail. If an external port has been defined for the database (see Lab Template Designer), they can also be accessed from the internet using the same connection credentials.
Lab Component Options
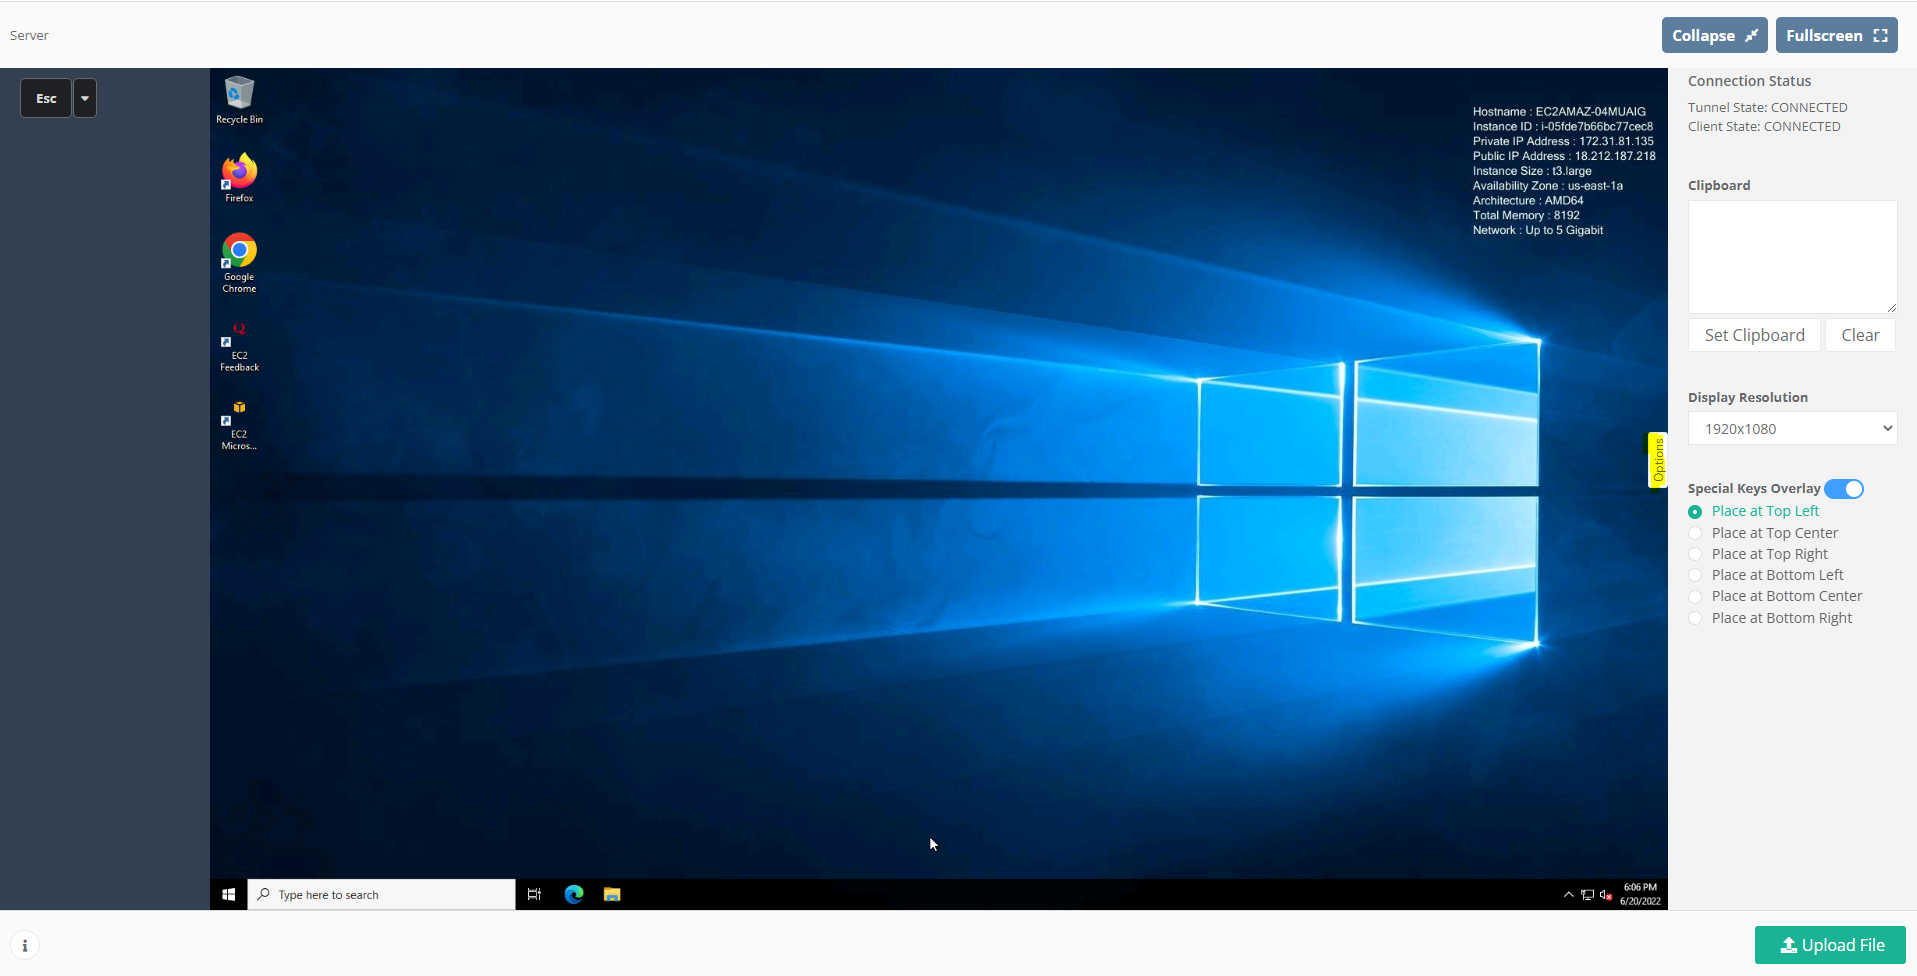
You can access the resource clipboard, display resolution, and special keys overlay by selecting Options from an expanded thumbnail. These settings will be remembered and saved as part of the lab template.
The clipboard control is used to paste information into the lab resource. For example, assume you had a complex password that you needed to enter in a window inside the lab image. Rather than manually typing it, you could copy and paste the password text from your host machine into the clipboard control. Then, select Set Clipboard to transfer the text into the lab image's clipboard so that you could issue a Paste command inside the lab image.
Adjusting the display resolution changes the size of displayed images inside the lab image window. The window itself will always resize to fit the available screen, so higher display resolutions will result in smaller the displayed images. Higher display resolutions can also, in some cases, increase network bandwidth requirements.
Show Custom Data
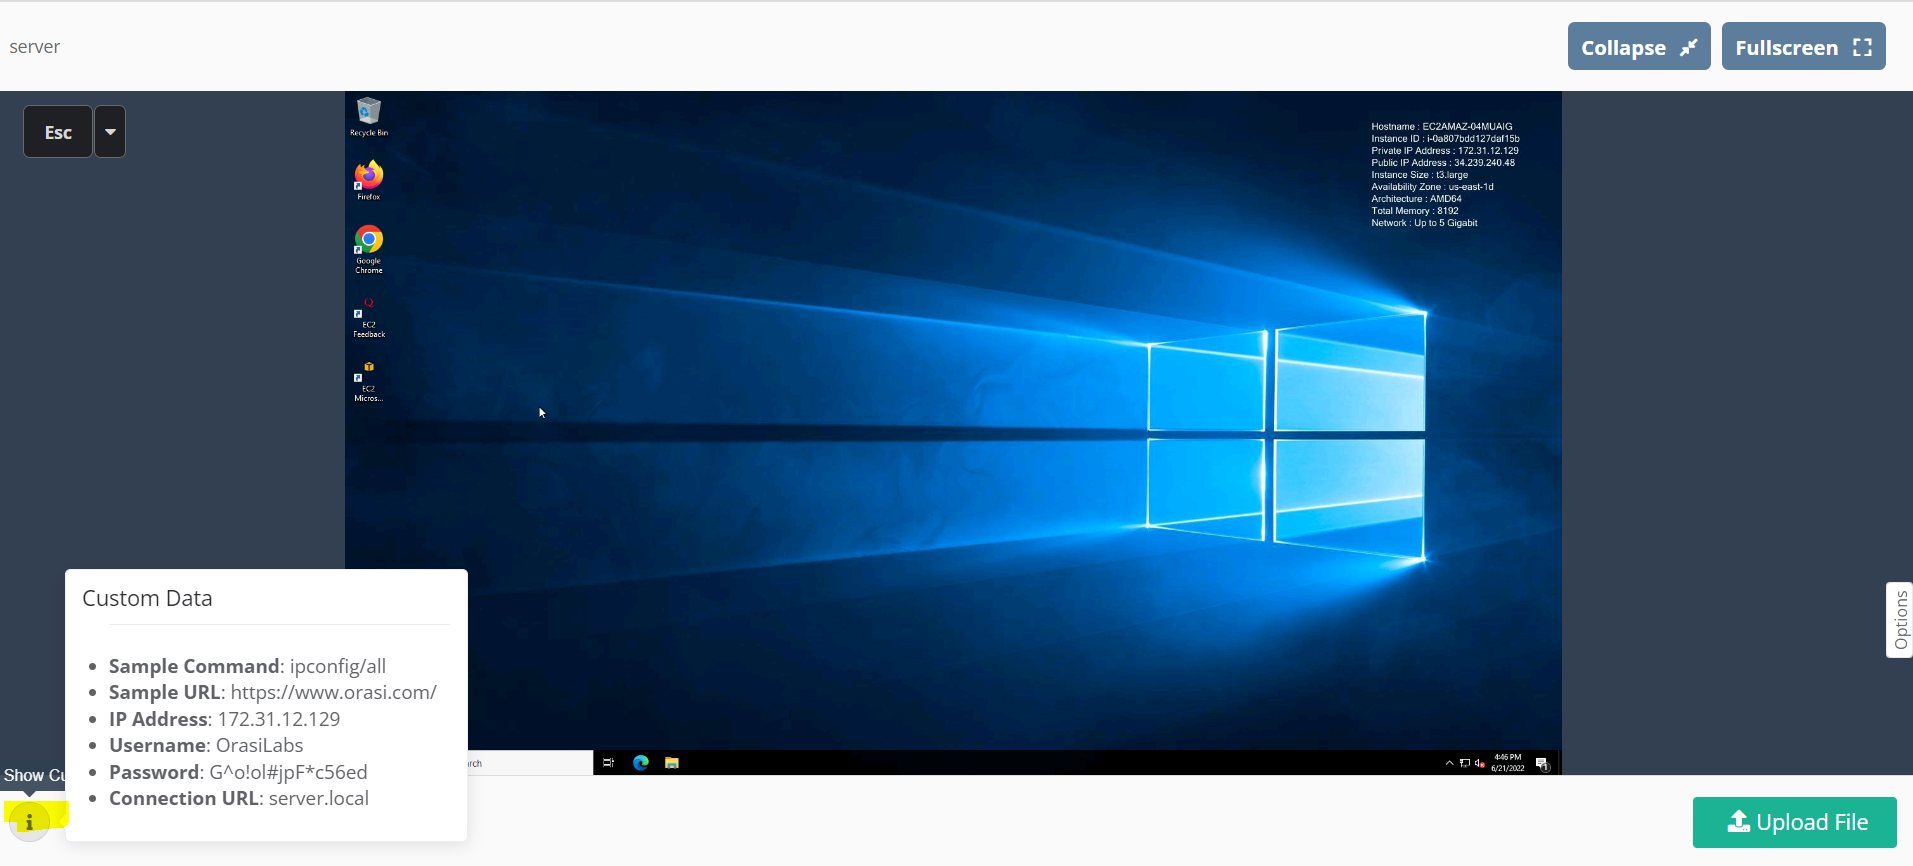
In both thumbnail and expanded views, selecting Show Custom Data (represented by a lower case "i" in the left-hand corner) displays additional information about the lab component. By default, the connection information is included (IP address, username, password) as well as any custom data key/value pairs. Custom data settings are established by editing the lab template Data settings for each component.
Upload Files
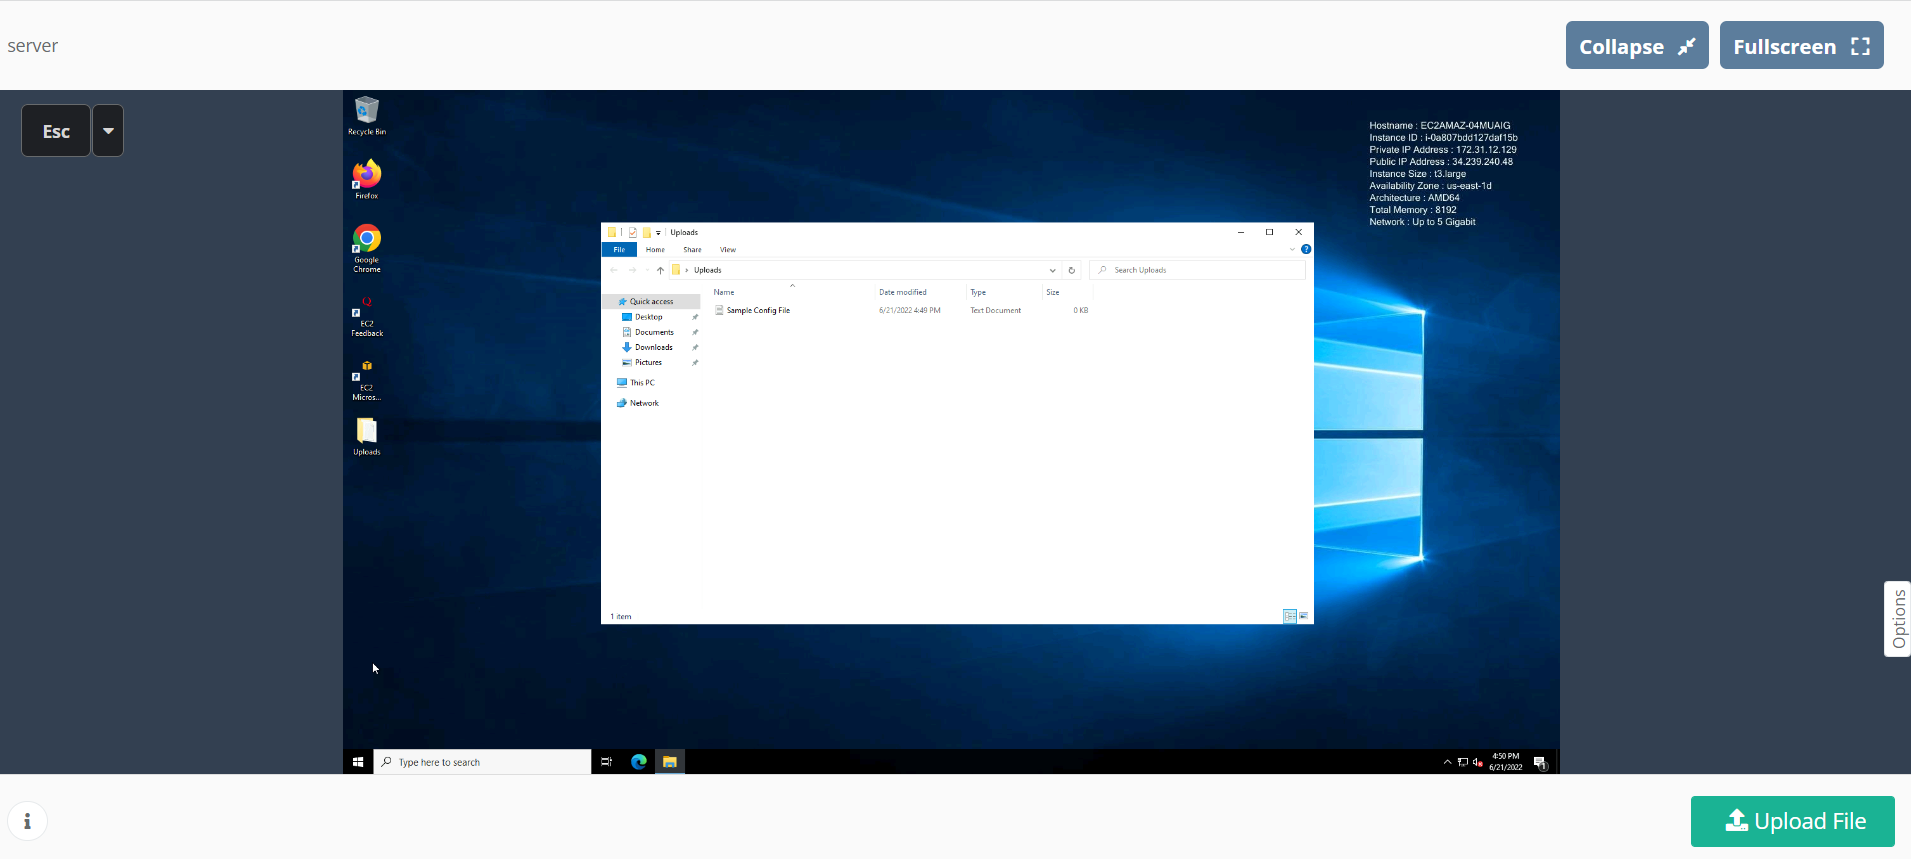
You can upload files to the resource image with Upload Files. For Windows-based images, uploaded files will automatically be put in a folder named "Uploads" on the user's Desktop.
You can also change operating system settings and open windows in the client session. Any changes made can be saved as part of the lab template state.
Save Lab Image Changes
Once all of your desired customizations have been made, select Collapse to reduce the resource window to a thumbnail again. From the Lab Template Actions, select Stop.
You will then be prompted to decide what to do with the changes. The options will differ for published and unpublished templates.
Saving Changes to Unpublished Templates

If the template is currently unpublished, you will have the following options when stopping the template.
Select Save to save the changes and keep the template unpublished,
Select Stop and Publish to publish this template so that it can be used in a class. You can also publish the lab template later using the Publish button if you prefer.
Select Discard to revert to the previously saved version of the template. The lab template will be rolled back to the last saved version.
As changes are saved, the template definition is updated and all subsequent usages of this template will inherit the saved changes. Keep in mind that classes that were previously associated with this template and have already been started will not inherit these changes.
A new restore point for each template resource is created each time the template is stopped. To return a lab template resource to a previous restore point, see Rollback Lab Templates.
Saving Changes to Published Templates

If the template is currently published, you will have the following options when stopping the template.
Select Save to save the changes. This updates the lab template definition. All subsequent usages of this template (e.g., adding the template to a new class) will inherit the saved changes. Keep in mind that classes that were previously associated with this template and have already been started will not inherit these changes.
Select New to create a copy of the template with the new changes. This option will allow you to save your changes but not impact any classes that are using the original template.
Select Discard to revert to the previously saved version of the template. The lab template will be rolled back to the last saved version.
A new restore point for each template resource is created each time the template is stopped. To return a lab template resource to a previous restore point, see Rollback Lab Templates.
Where to go from here...
Lab Template Overview
Publishing a Lab Template
Lab Template Permissions
Lab Template Labels
Deleting a Lab Template
Was this article helpful?
That’s Great!
Thank you for your feedback
Sorry! We couldn't be helpful
Thank you for your feedback
Feedback sent
We appreciate your effort and will try to fix the article