How to create and assign lab template labels for quick identification and filtering.
Lab templates are the reusable building blocks for other templates and classes. Consequently, an OrasiLabs tenant could have dozen or even hundreds of lab templates at one time. With such a large number, it could be difficult to find specific lab templates without wading through long, scolling lists.
Lab template labels were designed to help alleviate that potential problem. Labels serve as visual cues about the purpose or content of a lab template. They can also be used to group similar lab templates so that filters can quickly hone in on a specific template or set of templates for a task.
Think of labels as a reusable set of tags or stickers that can be associated to a lab template. Each template can have none of these labels or many labels, as appropriate. Similarly, each label can be related to no templates or many templates. Labels are also very dynamic and can be quickly attached to or detached from lab templates, as desired.
Viewing Lab Template Labels

Lab template labels are visible in the Lab Templates list. They are displayed as oval icons immediately below the name of the lab template to which they are associated. If the lab template has more than one label associated, the labels will be displayed in a horizontal row with as many as space will allow.
Each label is assigned a background color when it is created (see below). The oval icons used to display the labels are shaded accordingly in the Lab Templates list.
Filtering with Lab Template Labels

Lab template labels can also be used to define a filter condition in the Lab Templates list. To add a label condition to the filter, select Filters, expand the Labels list, and select one or more existing labels. In this manner, the Lab Templates list will be restricted to just those lab templates that are associated to the specified labels.
Associating Labels to Lab Templates
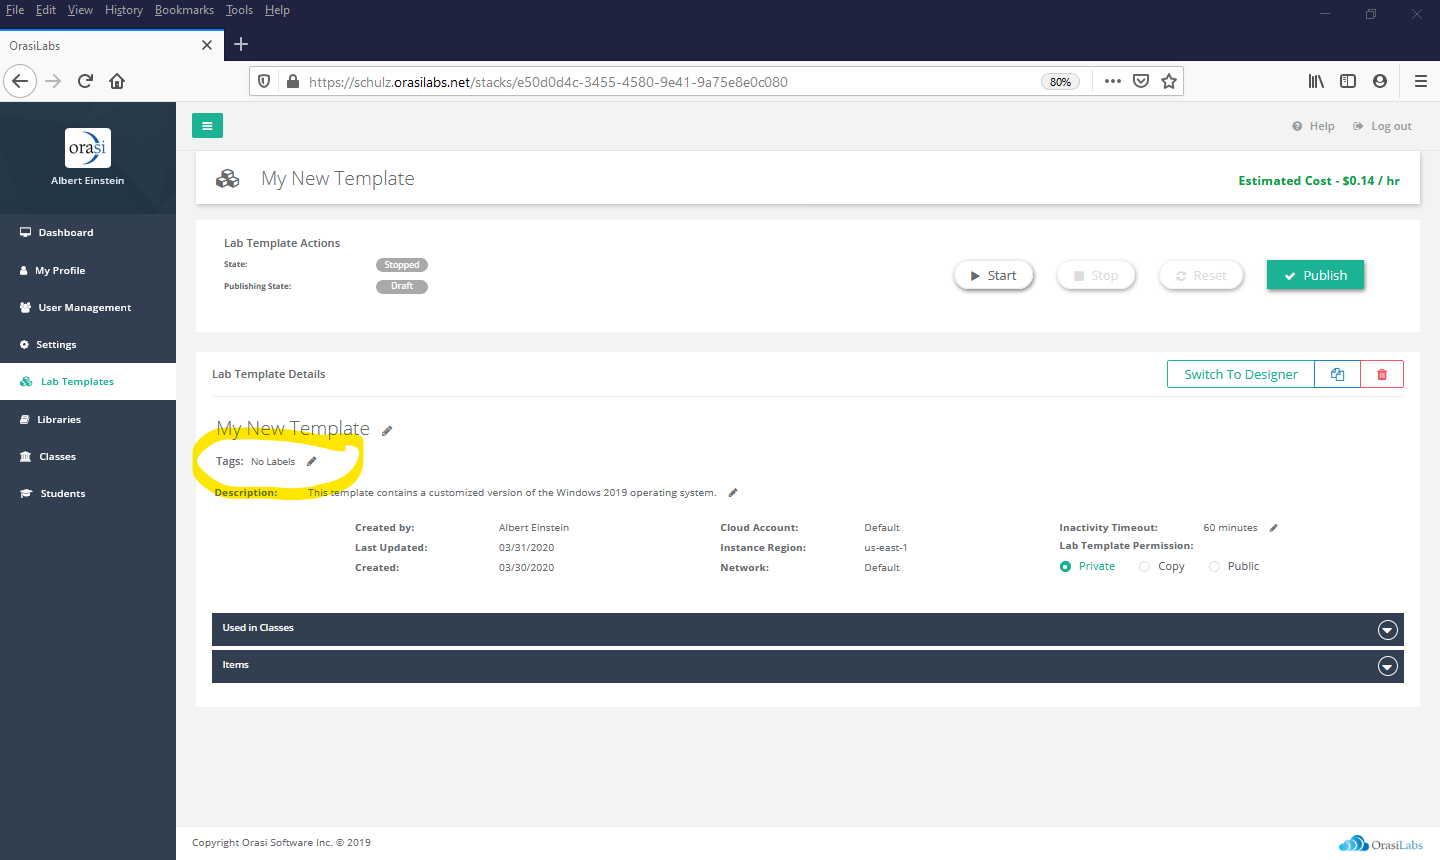
To associate a label to a lab template, first open the Lab Template Details by selecting the desired template from the Lab Templates list. Labels currently associated to the template are listed in Tags. Click the pencil icon next to Tags to add or remove labels for the current template.
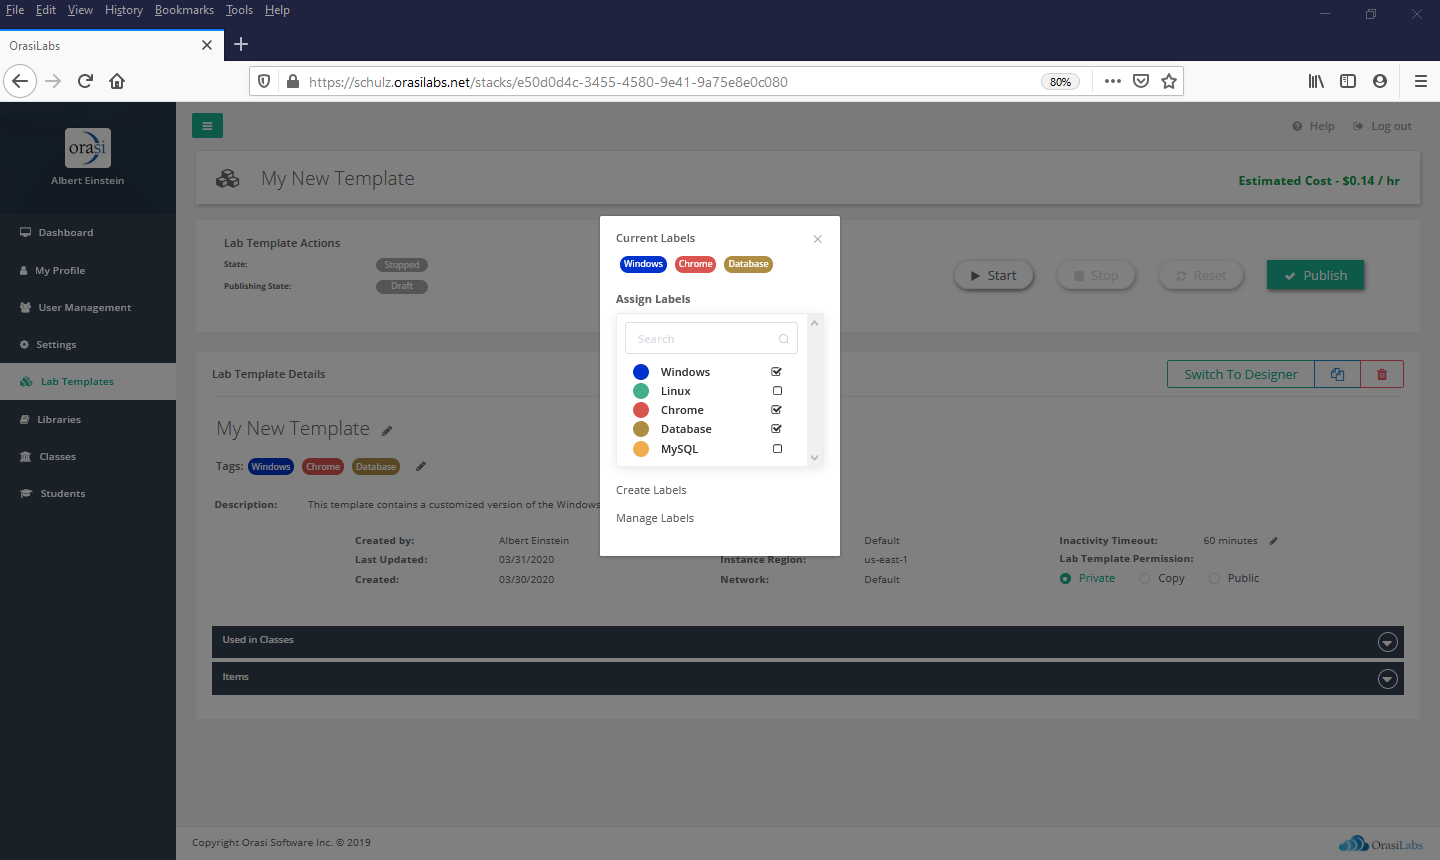
Check the box next to a label in the Assign Labels list to add it to the current lab template. Uncheck the box to remove it from the current lab template. Any number can be selected or deselected and changes are saved automatically.
Creating a new Lab Template Label

To define a new label, select Create Labels and enter the name for the new label. You must also select a background color for the label from the available color choices. The label will be added to the global pool of labels and is now available to associate to any lab template in the OrasiLabs tenant.
Editing or Deleting Lab Template Labels

Select Manage Labels to edit the properties for an existing label or to delete a label entirely. Select Edit (represented by the pencil icon) to change a label's name or background color. Select Delete (represented by the trash can icon) and select Delete on the confirmation dialog to disassociate the label from all templates and delete it permanently.
Caution!
Deleting a lab template label is a destructive operation and cannot be undone. Once the label is deleted, the associations to lab templates are lost and the label cannot be recovered.
Where to go from here...
Lab Template Overview
Customizing a Lab Template
Publishing a Lab Template
Lab Template Permissions
Deleting a Lab Template
Was this article helpful?
That’s Great!
Thank you for your feedback
Sorry! We couldn't be helpful
Thank you for your feedback
Feedback sent
We appreciate your effort and will try to fix the article