How to create a new lab template as a copy of another.
Lab templates can be created in several ways. For single-image lab environments, the Lab Template Wizard provides a quick and easy way to build new lab templates from base images or from other lab templates. For more complex environments, however, the Lab Template Designer provides a graphical interface to define the required components.
Rather than creating new lab templates from scratch, they can also be created by copying another lab template with the Lab Template Wizard. When an existing lab template is used to create a new one, the new lab template inherits all the configuration from the existing one. It is a quick and easy way to build slightly different versions of the same environment or to test out new changes before they are committed to permanent resources.
For a brief example using the Lab Template Wizard to copy an existing lab template, view the video below. For more detailed instructions, see the example below the video.
Using the Lab Template Wizard to Copy a Lab Template
Invoke the Lab Template Wizard
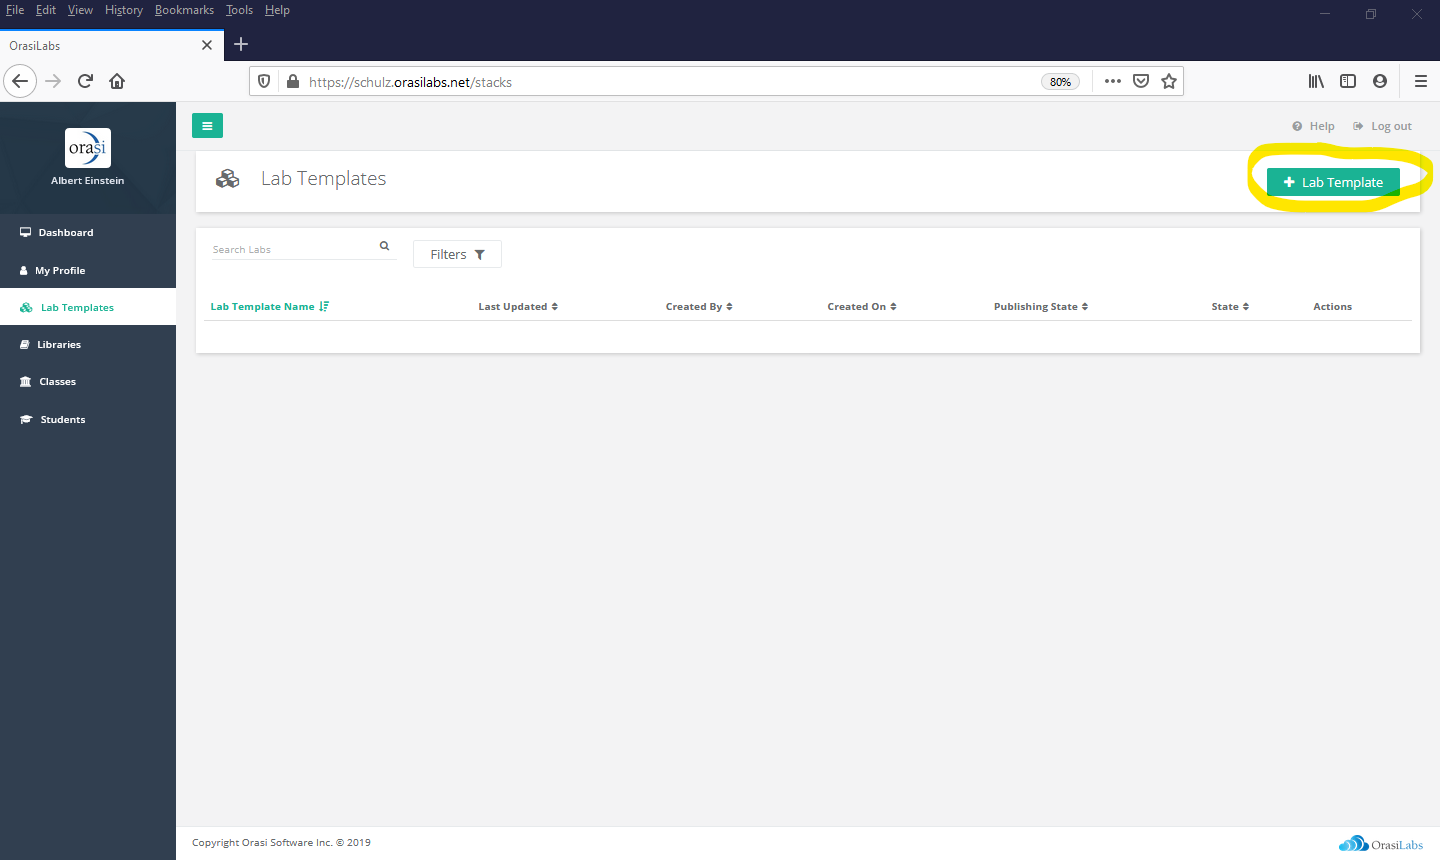
Invoke the Lab Template Wizard by selecting +Lab Template from the Lab Templates list. Alternatively, you can also invoke the wizard by selecting +Create on the Onboarding Status widget in the Dashboard.
Step 1 - Basic Information

First, provide basic information about the new lab template object, including the name, and description. The lab template name must be unique within the OrasiLabs tenant in which you're working.
You must also specify the access permissions to apply to this lab template. These permissions govern who can view, copy, or modify the template once it's created. The default permission is Copy.
You can also use this step to create and/or assign labels to the template for easy identification and filtering. These labels will be displayed in the Lab Templates list once the template is created.
Finally, select Next to advance the wizard.
Step 2 - Selecting the Existing Template
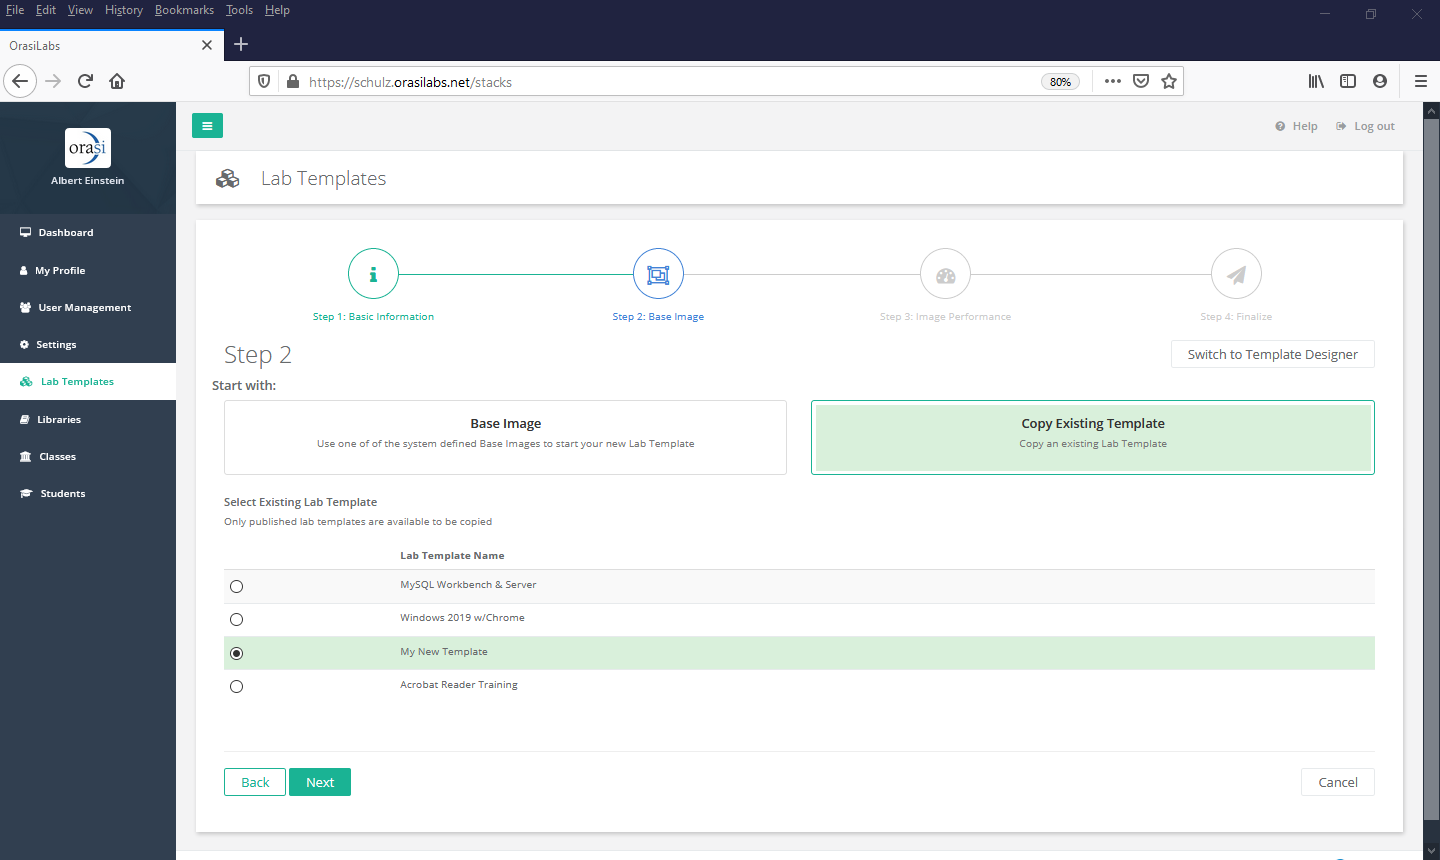
Rather than selecting a Base Image as the source, use the Lab Template Wizard to choose an existing lab template by selecting Copy Existing Template. Then, select a lab template from the list provided.
Please keep in mind that the new lab template being created will be a duplicate of the source image as it exists at that moment. Later changes to the source image will not be reflected in the new lab template once the Lab Template Wizard is finished.
Once a selection is made, select Next to advance the wizard.
Step 3 - Image Performance
Unlike other uses of the Lab Template Wizard, image performance settings are not available during a copy operation. Instead, the new lab template will automatically inherit the image performance settings from the source image and the wizard skips directly to Step 4.
Step 4 - Finalize

The last step is to review and finalize the lab template definition. The Lab Template Wizard will display all previous option selections. If any of the options don't look right, select Back to change selections made in previous steps.
Once the options look correct, select Submit to create the new lab template.

Congratulations! You've just created a new lab template. You can now use this lab template as the basis for other templates or to deploy a new class.
Where to go next...
Lab Template Overview
Creating a Lab Template with the Lab Template Wizard
Creating a Lab Template with the Lab Template Designer
Customizing a Lab Template
Publishing a Lab Template
Lab Template Permissions
Lab Template Labels
Deleting a Lab Template
Was this article helpful?
That’s Great!
Thank you for your feedback
Sorry! We couldn't be helpful
Thank you for your feedback
Feedback sent
We appreciate your effort and will try to fix the article