How to introduce OrasiLabs to students who've never used it before
This article is designed to provide a possible introduction script to students who've never used OrasiLabs. It's not intended to be used as a verbatim speech but rather a general guide that explains the basic function of OrasiLabs. It's written from the point of view of an instructor, and it includes links to more detail around each topic.
1 - What is OrasiLabs?
OrasiLabs is a cloud-based lab environment where I've preloaded all the software and training files you'll need during class. You'll open our software/website in the OrasiLabs machine, not on your local PC, so that I'll be able to see what you're doing and help you out when necessary.
Note: For more detail, please see the article Getting Started as an OrasiLabs Student.
2 - Open the invitation and join the class
You should have already received an email from OrasiLabs with the link you need to join the class. The email will come from "orasilabs@orasi.com" and will be titled with a subject of "You have been registered for a Class". You might have to check your Junk Mail folder to find it.
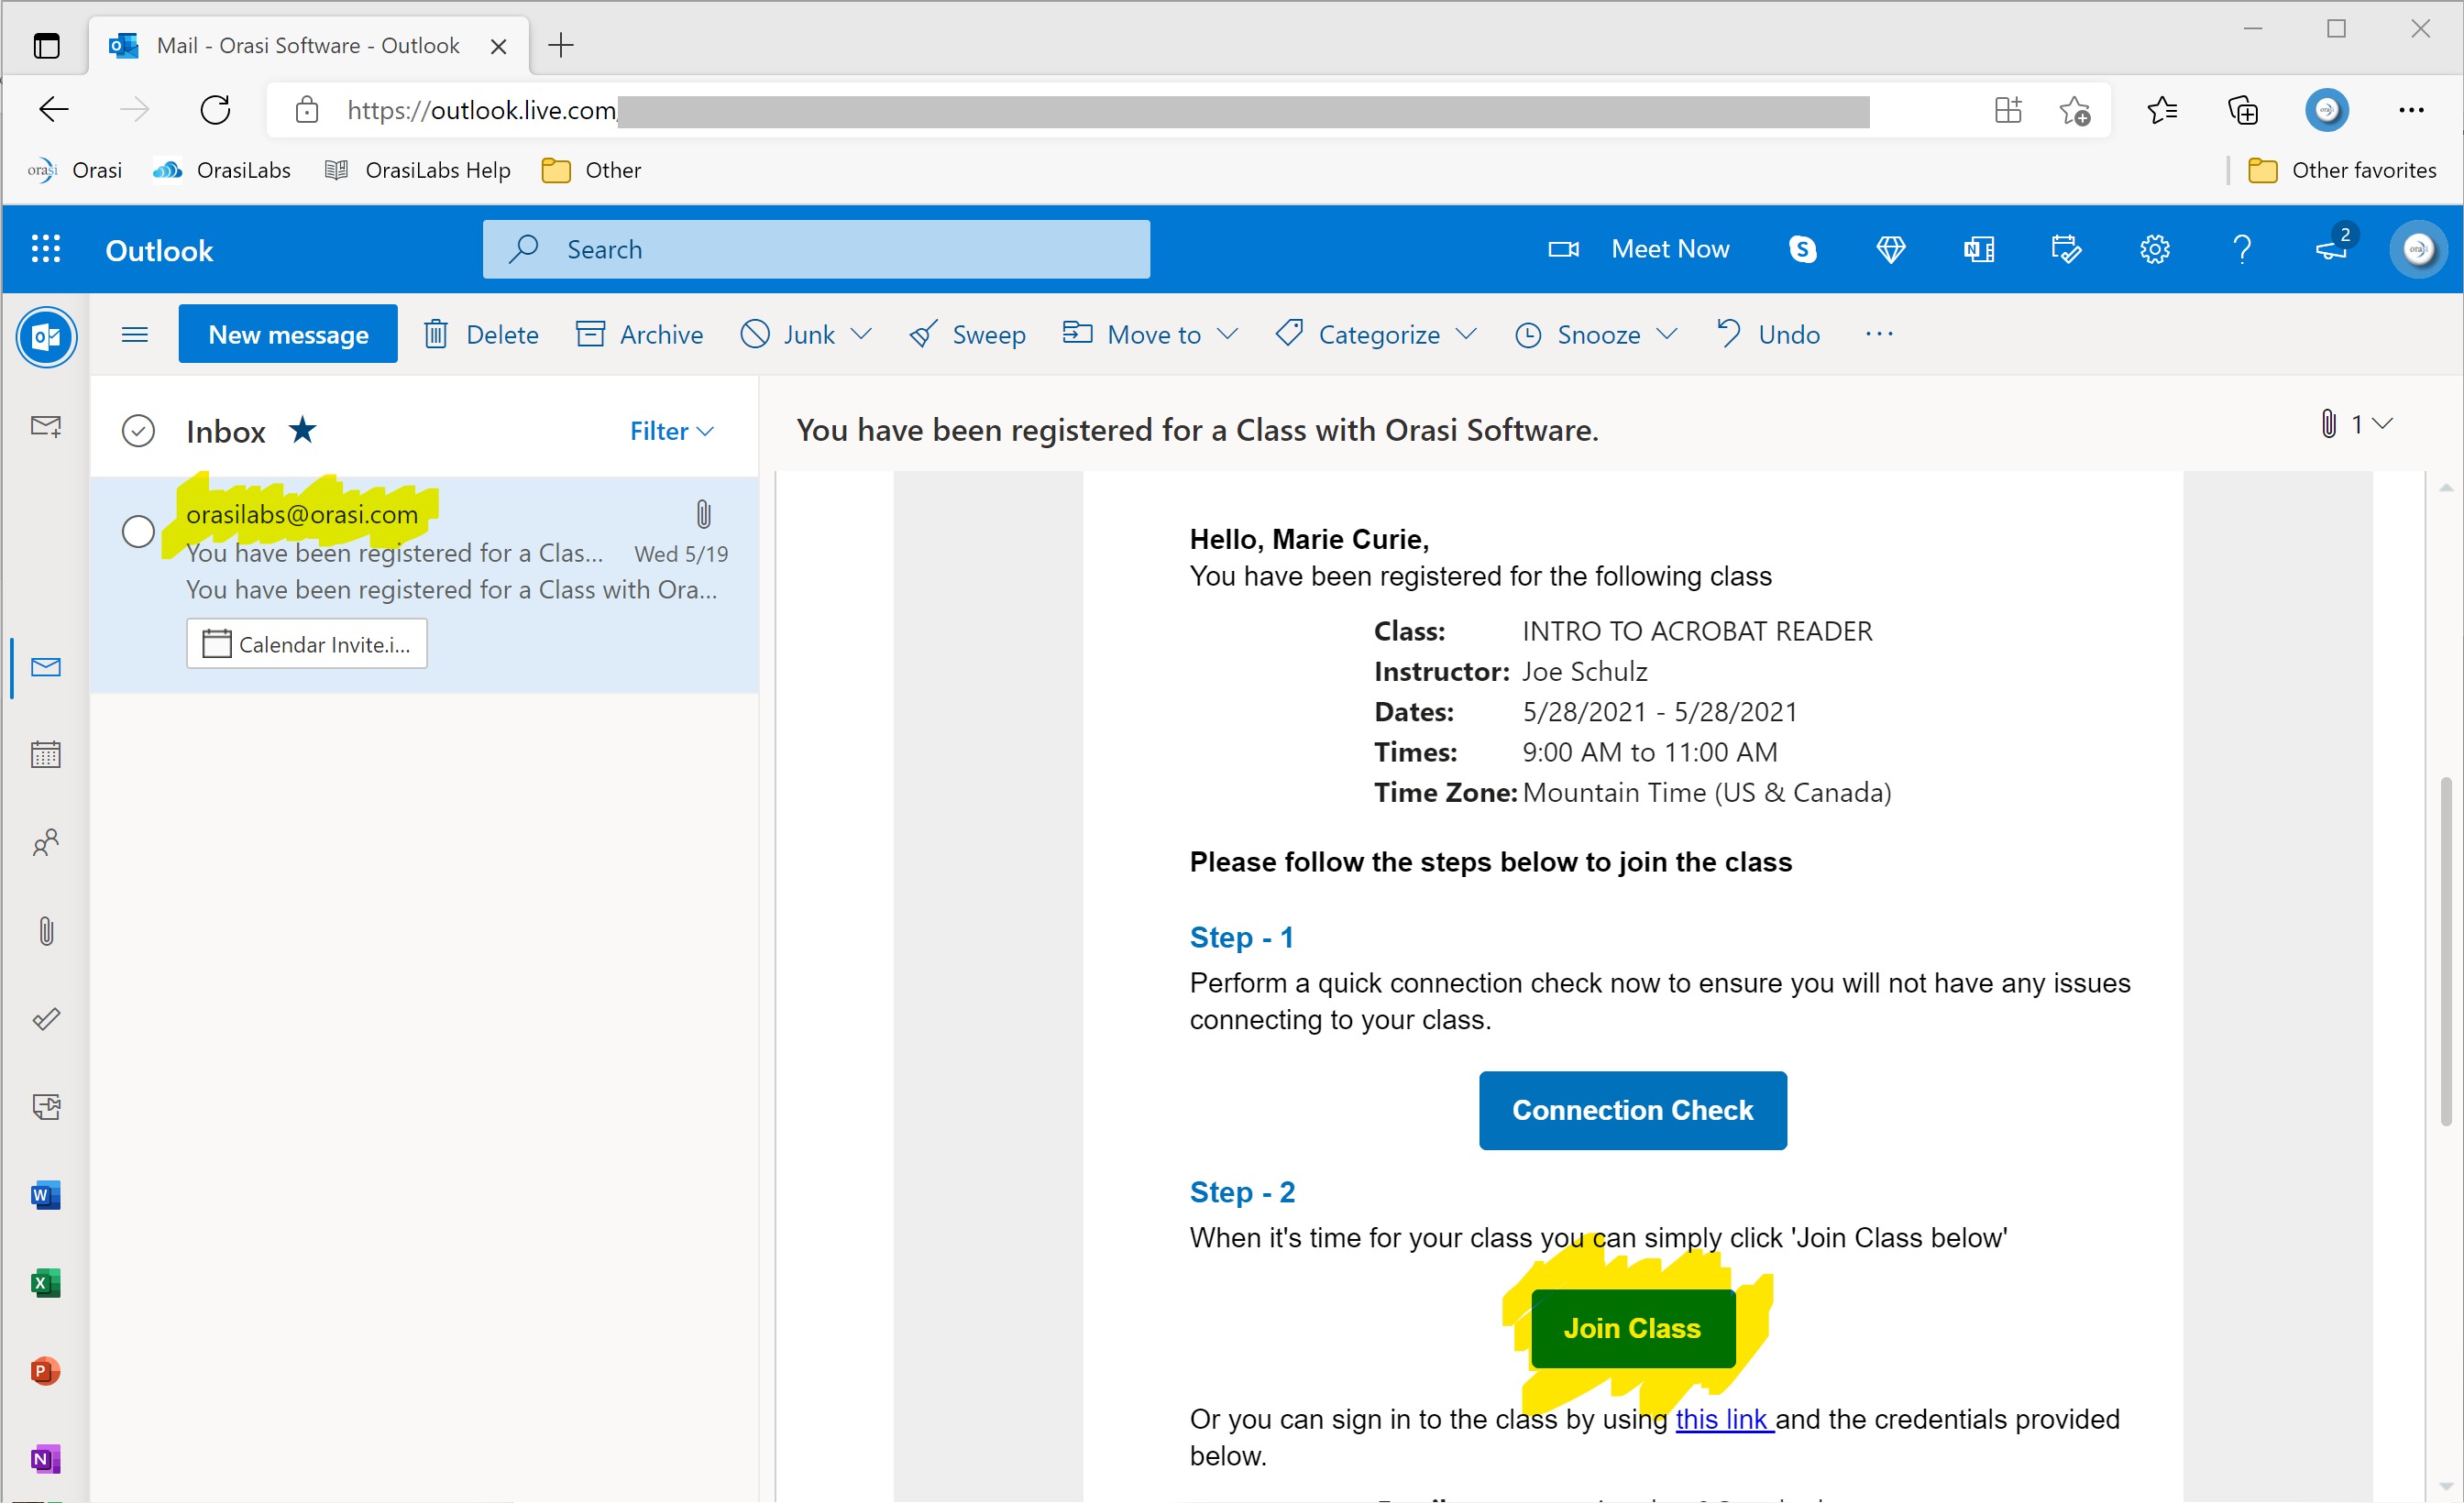
Once you find the email, click the blue "Join Class" button in the middle of the email. This should bring up your default browser and log you into OrasiLabs automatically. OrasiLabs won't work with Internet Explorer, so if that's your default browser, right-click on the "Join Class" button and select "Copy Link". Then open another browser (e.g., Chrome, Firefox, Safari) and paste the link into the address bar.
Note: For more detail, please see the article Logging into a Class as a Student.
3 - Open the lab
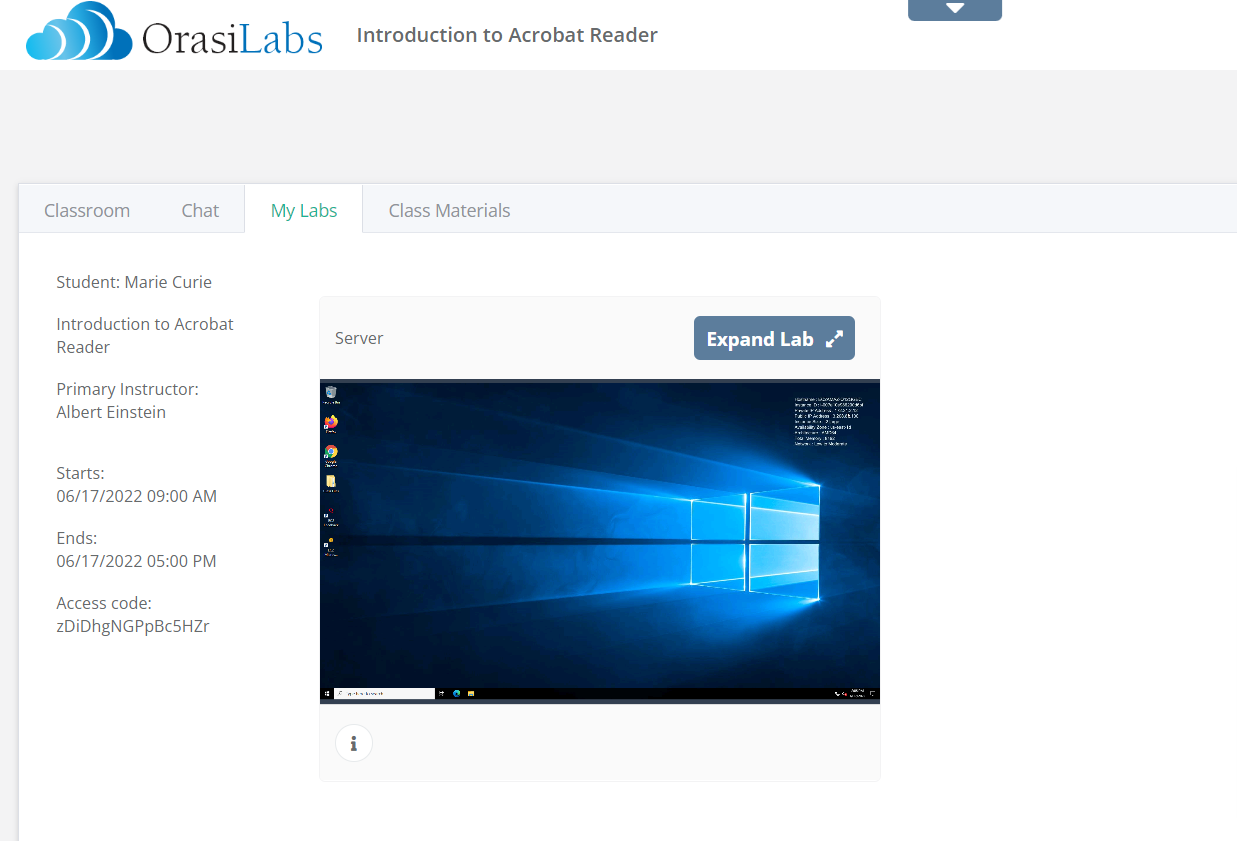
Now that you've logged into OrasiLabs, you should see a thumbnail of your running lab. This is a machine running in the cloud that's dedicated to you, and you'll use it for all of our class exercises. To open it, just click the Expand button in the top right corner of the thumbnail.

This is called Expanded Mode. In this view, you can use the lab like you would any Windows PC. You can also use the Options tab to access the copy/paste clipboard or to resize the window. You can even press the Request Help button to let me know when you have a question. To close the lab, click the Collapse button in the top right corner.
If it's hard to see the icons or read the text when you're in Expanded Mode, you can also open up Full Screen Mode by clicking on the Full Screen button in the top right corner. This will remove all of the browser controls and make the lab take up the entire screen. To exit Full Screen Mode, just hit the Escape key (ESC).

Note: For more detail, please see the article Using the Student Portal.
4 - Labs will automatically save
I've set the lab to automatically pause whenever it's not used for 60 minutes. So, if we're on a break or a class discussion goes long, your lab might pause. If that happens, you'll be disconnected from your session but the lab will automatically save all of your progress.

You can always restart the lab by pressing the Play button in the thumbnail or at the bottom of the screen. The lab will restart and pick back up where you left off. If you need to leave the class for a while (e.g., lunch or break), you can also manually pause the lab by clicking the Pause button at the bottom of the screen.
And that's all it takes to use OrasiLabs! Let me know if you have any questions by pressing the Request Help button now.
All students should also be made aware of the articles in this knowledgebase regarding the "Student Experience".
Was this article helpful?
That’s Great!
Thank you for your feedback
Sorry! We couldn't be helpful
Thank you for your feedback
Feedback sent
We appreciate your effort and will try to fix the article