How to open a student lab or view the instructor presentation.
Student Portal
For a video walkthrough of the Student Portal, please watch the following video:
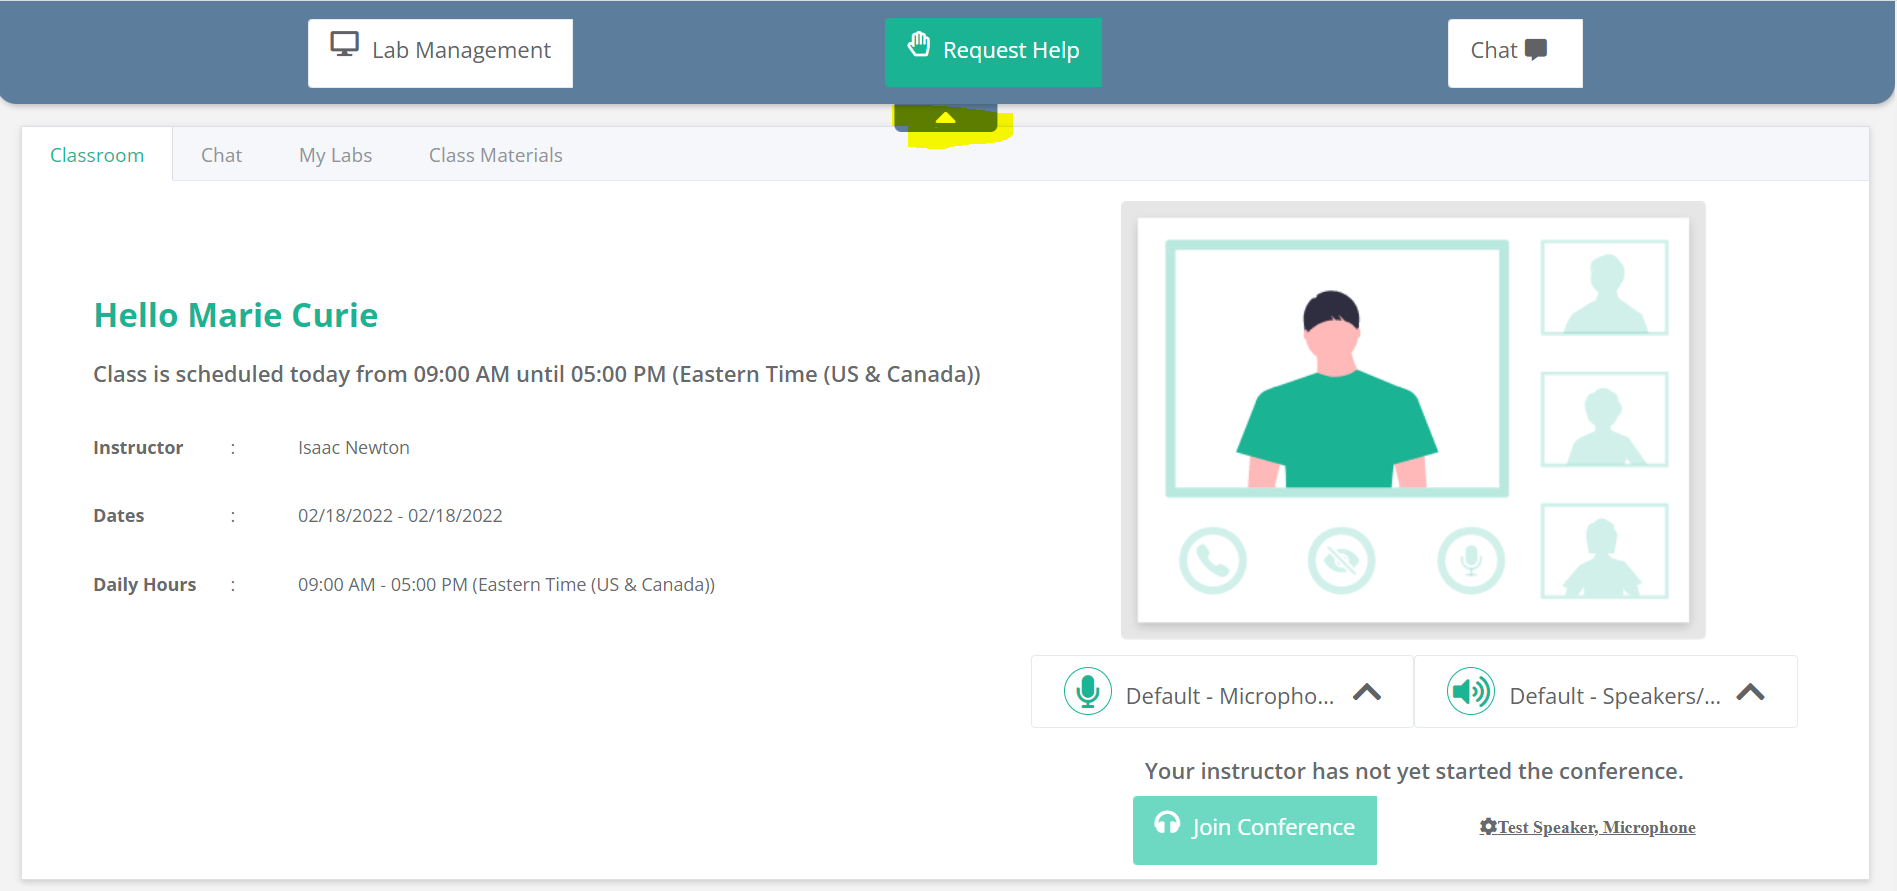
Each student is provided a dedicated Student Portal which will consist of a Classroom, Chat, My Labs, and (optional) Class Materials tabs. The name of the class will be listed at the top of the screen, along with options to perform a Connection Check and to Logout.

NOTE: The class above uses OrasiLabs integrated conferencing and therefore contains additional options.
Control Panel
The student has a Student Control Panel available via the arrow at the top of the screen. This Control Panel gives the student access to common tasks from any tab within the Student Portal. The exact options available on the Control Panel will vary depending on the status of the class. For example, if the student has joined the conference, they will have the option to Mute/Unmute.
Classroom
If the instructor has not started the session, the student will see general information about the class. The Conference, Chat, and Lab will not be available until the instructor has placed the class In Session.
Integrated Conferencing

If the class is using OrasiLab integrated conferencing, the Classroom tab will have everything necessary to participate in audio conversations with the class and see the instructor's screen share. These controls will become available once the instructor starts the Session. For complete details on using OrasiLabs conferencing, please refer to the article Joining a Class Conference as a Student.
3rd Party Conferencing
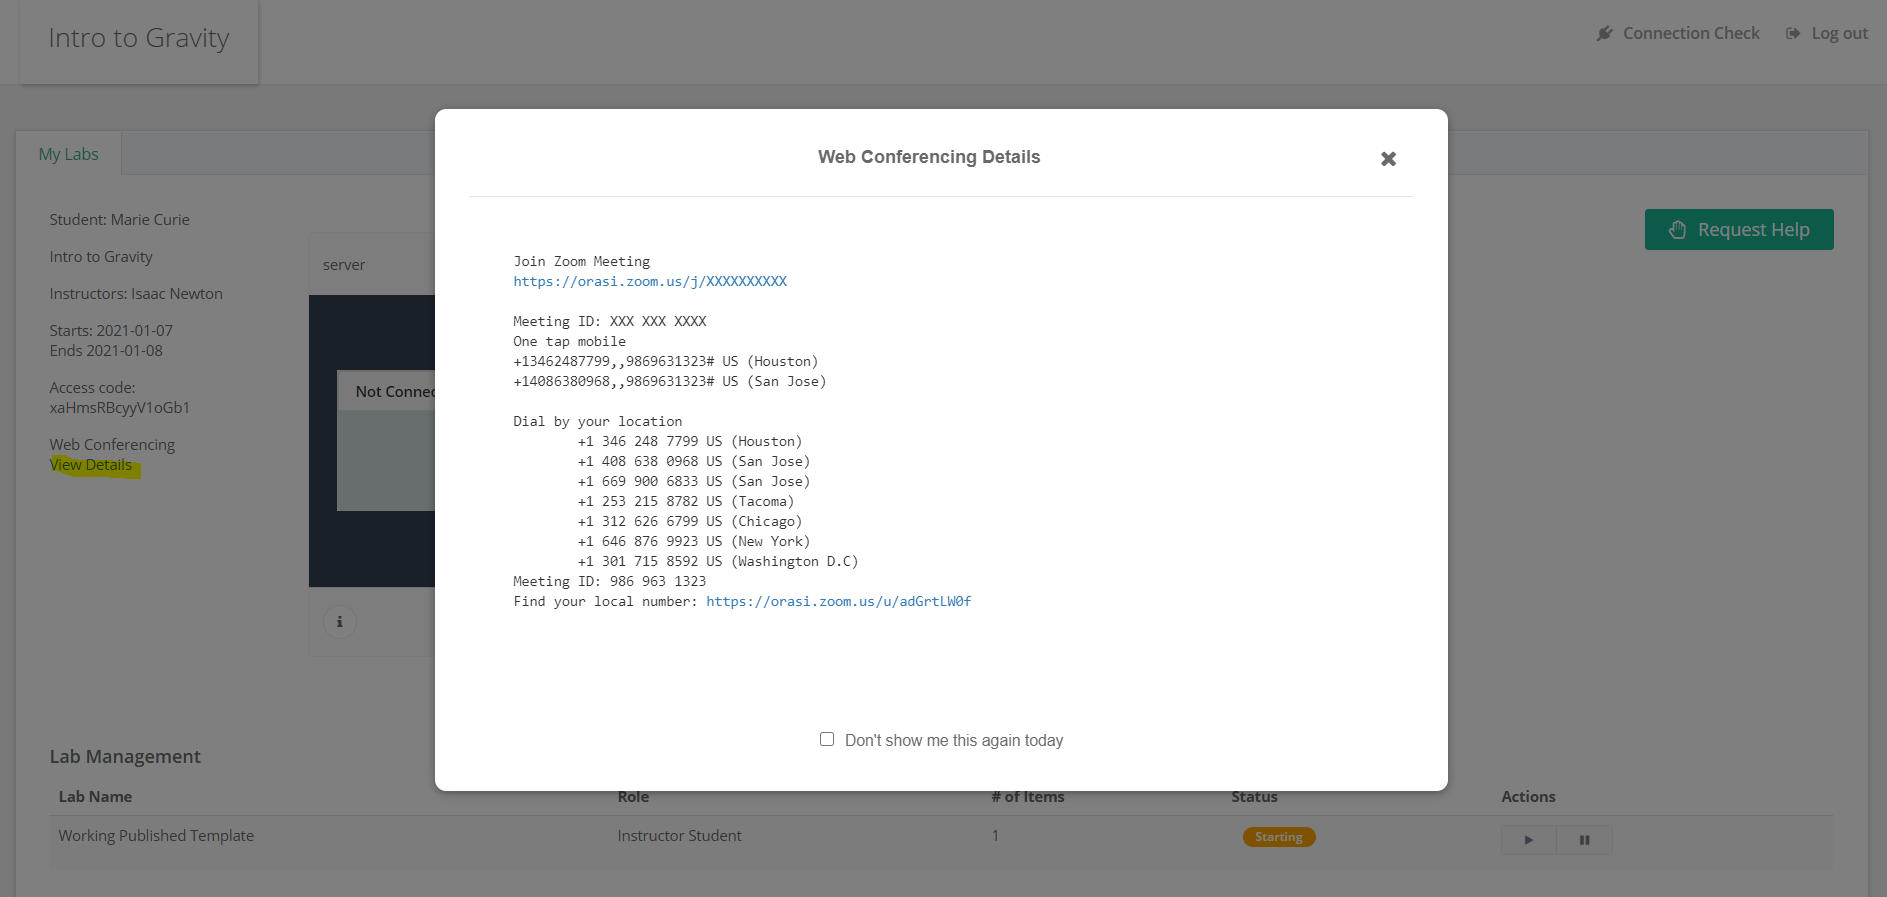
If a third-party conferencing solution is being utilized, students will see conference details via a pop-up when they join the class. This information is also available at any time by selecting the View Details link on the left side of the student portal. Once the web conference information is displayed, the student can either select the appropriate link or open another browser window and manually enter the web conference details.
Chat

If enabled for the class, you will have the ability to send chat messages to the entire class and individual participants. This can be done from the Chat tab or from the Chat option in the collapsible control panel at the top of the page.
My Labs
Starting the Class Lab

When the student first logs in, the lab may show currently in use either by the student or the instructor. To connect, the student can Play the lab (represented by a large arrow button in the middle of the lab thumbnail).
Paused Labs

In some cases, the lab itself may be in a paused state, even if the class has already been started. This might happen if the student or an instructor manually paused the lab (e.g., to create a snapshot) or if the automatic auto-pause rule was invoked because an inactivity timeout was reached. To restart the lab, the student can Play the lab.
Opening the Student Lab

Once the student is connected and the lab is running, a thumbnail of the lab will be shown in My Labs. There will be one thumbnail for each lab resource that has been allocated to the student.
To open and use a lab, the student should expand the thumbnail with the Expand Lab button.
Expanded View
After expanding the thumbnail, the student's mouse and keyboard can now be used to use the lab as if it were a local machine. Every student's lab starts from the same saved image, but changes a student makes to it during the class will only affect their dedicated lab. Also, all changes are saved any time that a lab is paused or stopped.
From the Expanded View, the student can use the Collapse button in the top right corner of the lab to return to the Thumbnail View.
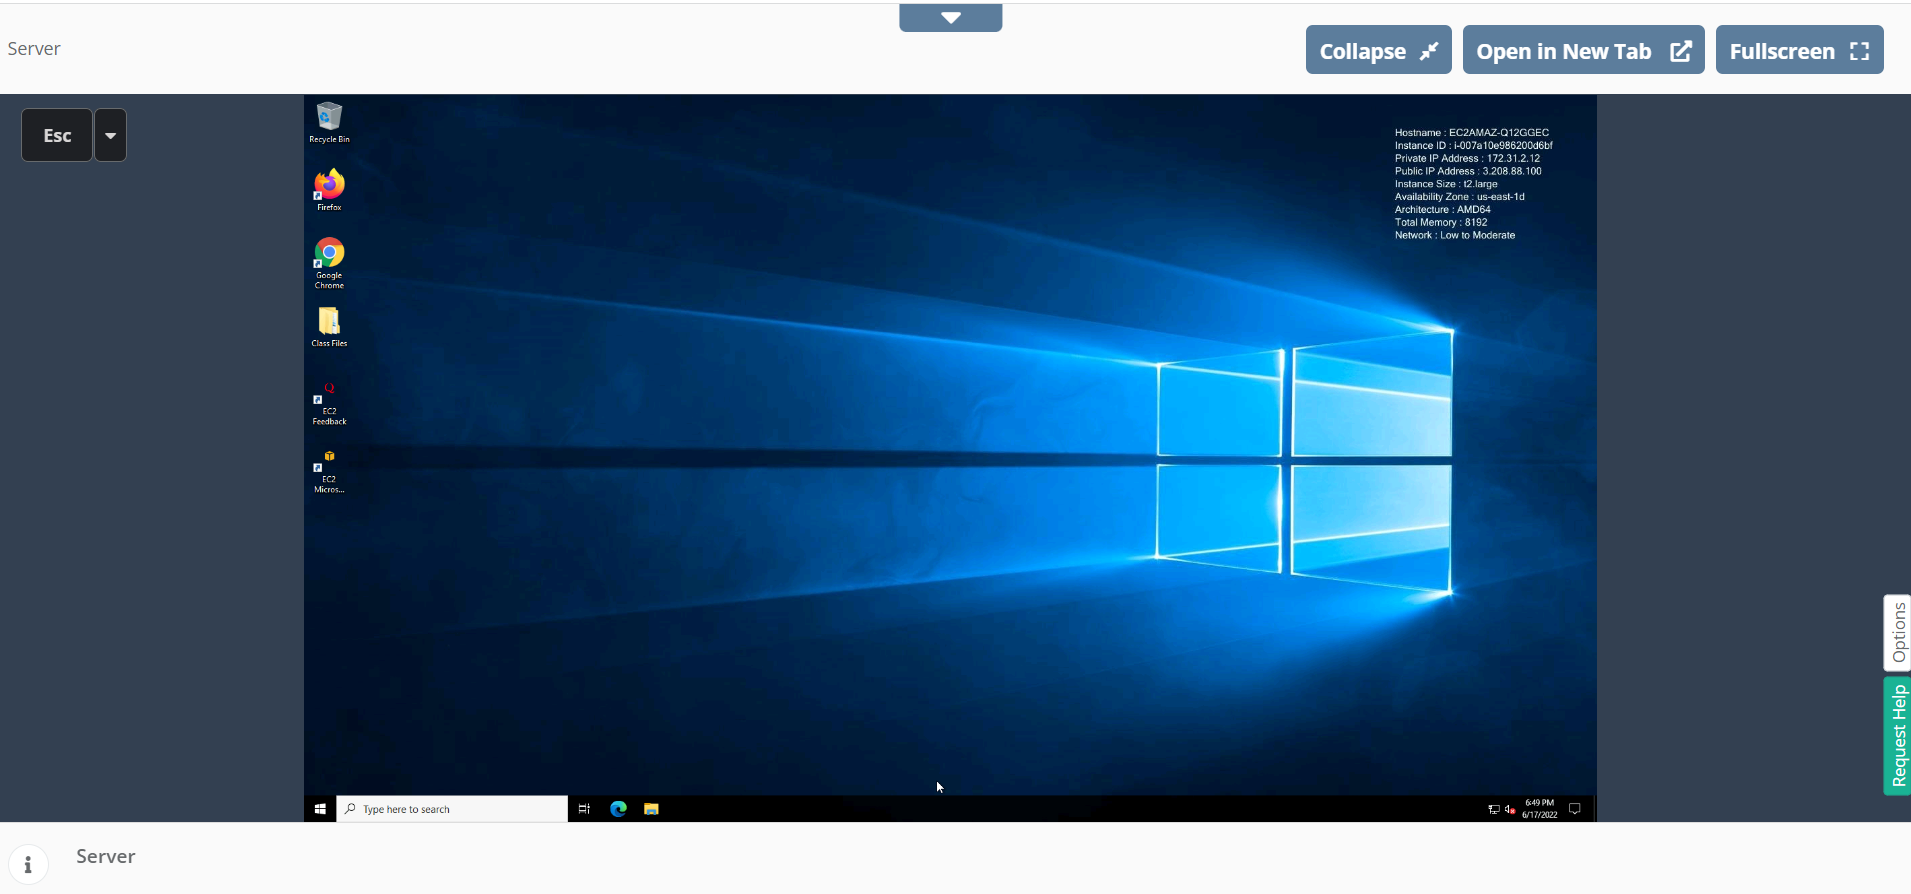
Full-Screen View

While the Expanded View is fully functional and can be used to manipulate a lab, sometimes fonts are pixelated or blurry due to screen resolution differences. To avoid these issues or to make fonts and icons larger, the student can also select Full Screen from the Expanded View in order to display the lab in Full-Screen view.
Full-Screen view utilizes the entire monitor for the lab display and hides the browser container the lab is running inside. While in Full-Screen view, the Options and Request Help are still available (see below) but the Show Custom Data feature is not available.
To exit the Full-Screen view and return to the Expanded view, the student can either press the Escape key or move the mouse to the top of the lab screen and select Toggle Full Screen (represented by a large X icon).
Lab Options

Additional settings are available by selecting Options from the expanded thumbnail. These settings will be remembered and saved as part of the lab configuration.
The clipboard control is used to paste information into the lab resource. For example, assume you had a complex password that you needed to enter in a window inside the lab. Rather than manually typing it, you could copy and paste the password text from your host machine into the clipboard control. Then, select Set Clipboard to transfer the text into the lab's clipboard so that you could issue a Paste command inside the lab.
Adjusting the display resolution changes the size of displayed images inside the lab window. The window itself will always resize to fit the available screen, so higher display resolutions will result in smaller displayed images. Higher display resolutions can also, in some cases, increase network bandwidth requirements.
Special Keys Overlay allows special keys such as Function Keys, Escape, and Ctrl+Alt+Del to be used by positioning a special keys overlay onto the remote instance.
Show Custom Data

In both thumbnail and expanded views, selecting Show Custom Data (represented by a lower case "i" in the left-hand corner) displays additional information about the lab. By default, the connection information is included (IP address, username, password) as well as any custom data key/value pairs that the instructor has chosen to make available in the Lab Template design.
Pausing a Lab

At any time, a student can choose to Pause their lab (represented by a two-vertical-line icon in Lab Management). This will save any changes made to the lab in a new lab snapshot and stops the run-time execution of the lab. Paused labs can later quickly be restarted from their saved state by either the student or the class instructor.
Please note that a paused lab does still incur a run-time fee, though the fees are usually significantly less than those for a running lab. To cease run-time fees for a lab, the lab must be stopped rather than paused. For this reason, OrasiLabs includes auto-pause and auto-stop features that an instructor can define which determine how long inactive resources continue to run. Instructors can also choose to manually pause or stop student labs at any time, at their discretion.
Request Help
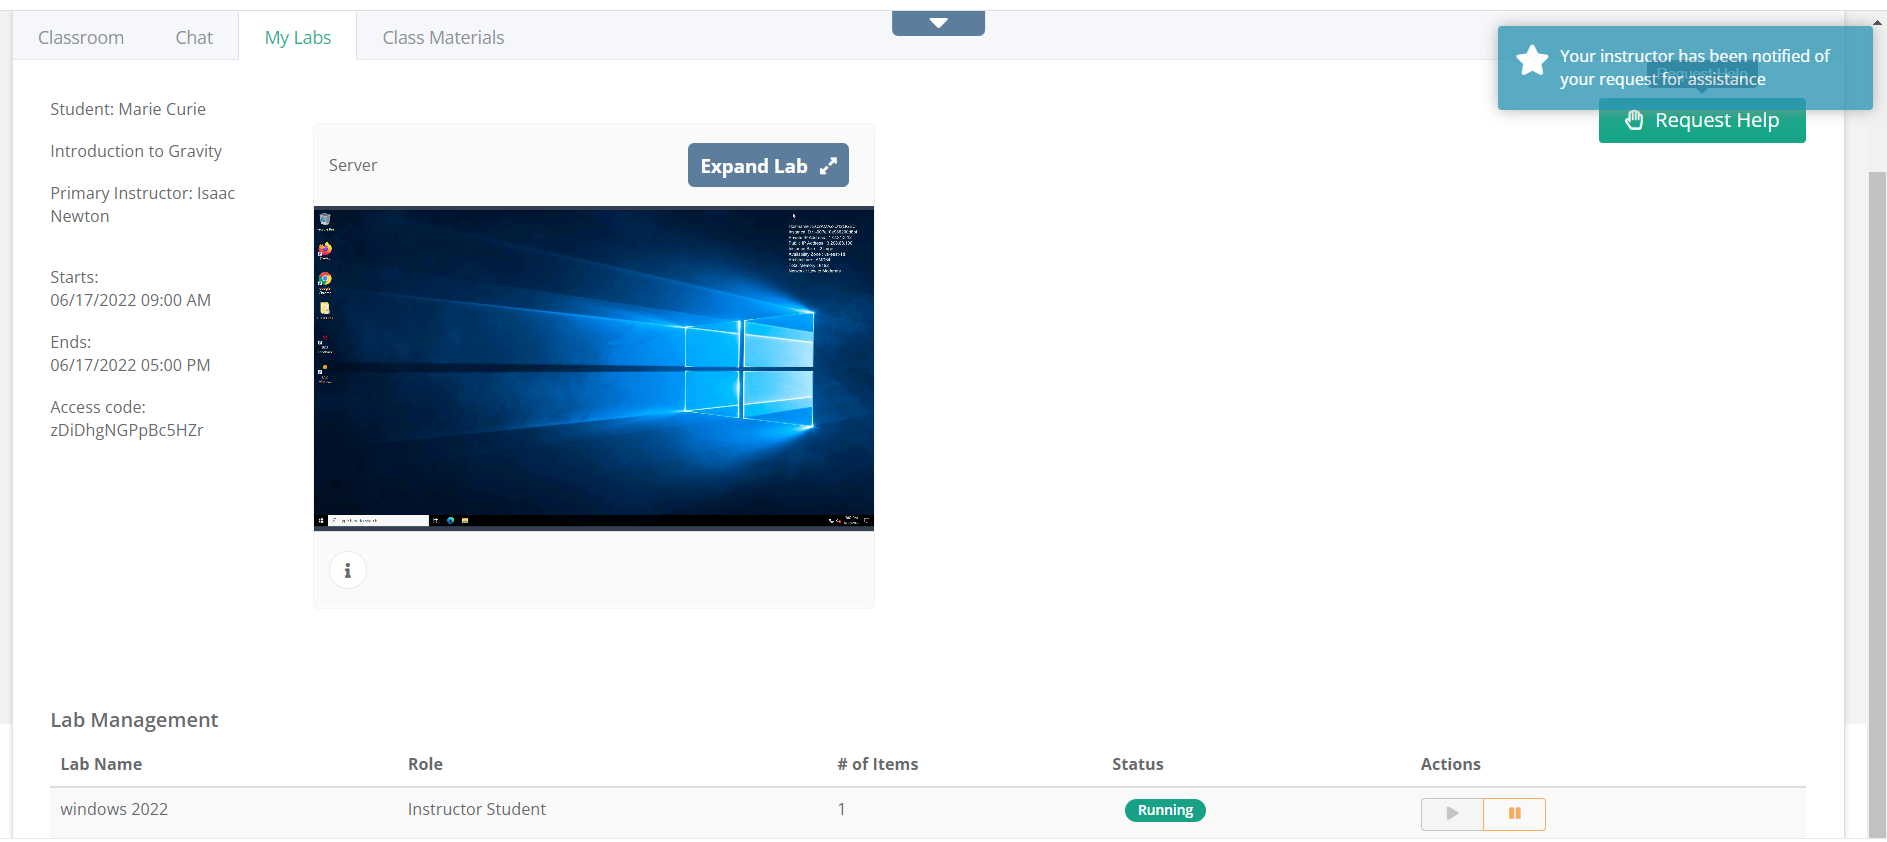
If at any time the student would like help from the instructor, the student can signal the instructor with Request Help in the Thumbnail View and while working in the lab. This feature will display a banner notification at the top of the instructor's window that the student has requested assistance. The banner will remain on the instructor's screen until the instructor manually clears it. A banner notification confirming the request will also show on the student's screen for about 6 seconds.
Class Materials

If your instructor has made any files available to you in your student portal, they will be organized in folders in the Class Materials tab. From here, you will be able to download the files to access them locally.
Where to go from here...
Was this article helpful?
That’s Great!
Thank you for your feedback
Sorry! We couldn't be helpful
Thank you for your feedback
Feedback sent
We appreciate your effort and will try to fix the article