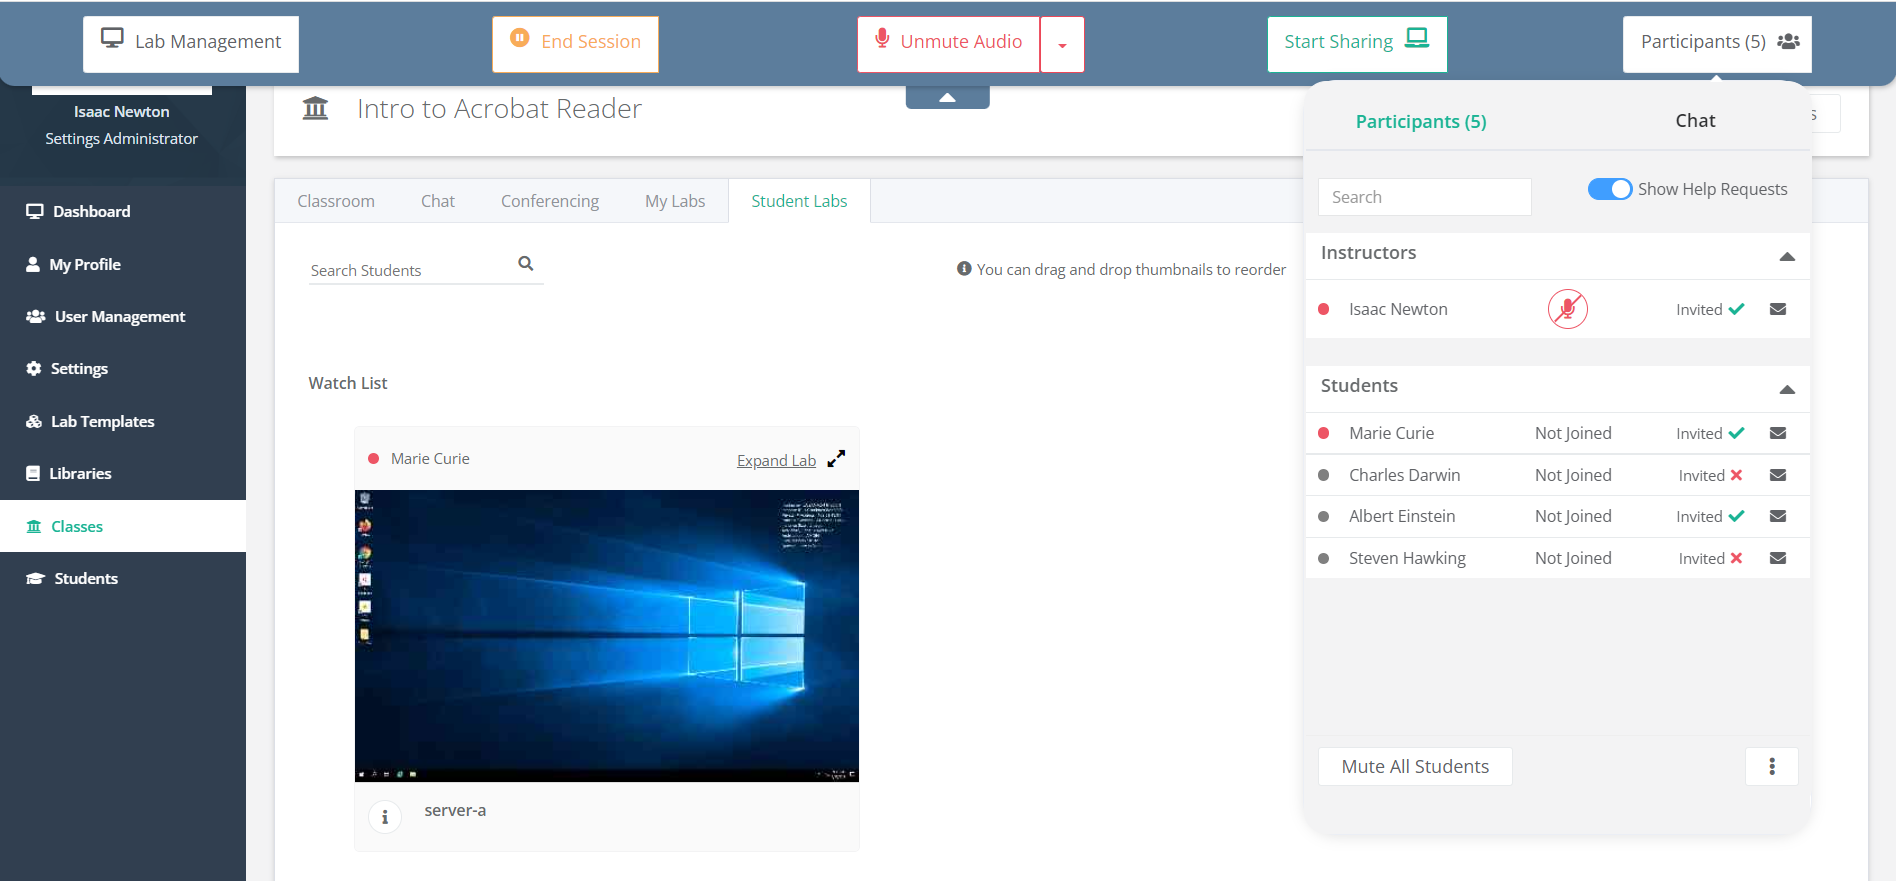
How to manage an instructor-led class using the pop-out Control Panel.
When an instructor opens the Class Delivery page for any class in which they have been added as an instructor, they will see a pop-out Control Panel at the top of the browser window (represented as an arrow pointing down). By selecting this down-arrow, the Control Panel will "slide out" from the top of the window and provide access to the most common class functions.

This Control Panel is available from anywhere within the Class Delivery page so that the instructor can stay in context of one feature (e.g., My Labs) and still manage the classroom functions. The five functions available in the Control Panel are listed in detail below and are the same regardless where it is opened.

To collapse the Control Panel, the instructor can simply click the arrow button again (which will now be pointing upward) and the Control Panel will "slide back into" the top of the window once again.
1. Lab Management
The Lab Management option allows the instructor to start, pause, or stop student labs in the current class. This is the same functionality available of the Classroom section of the Class Delivery page. When the instructor selects Lab Management, a list of all student labs will display their current status. The Start/Pause/Stop buttons will be enabled or disabled, as appropriate, and can be used to manage the current status of each lab.

2. Begin/End Session
The Begin Session and End Session options allow the instructor to start or stop an active class session. This is the same functionality available in the Classroom section of the Class Delivery page.
3. Mute/Unmute Audio
The Mute Audio and Unmute Audio options allow the instructor to enable or disable audio sharing for the active class conference. This is the same functionality available in the Conferencing section of the Class Delivery page. This option is only available in classes using OrasiLabs integrated conferencing.
4. Start/Stop Sharing
The Start Sharing and Stop Sharing options allow the instructor to enable or disable audio sharing for the active class conference. This is the same functionality available in the Conferencing section of the Class Delivery page. This option is only available in classes using OrasiLabs integrated conferencing.
5. Participants List
The Participants option allows the instructor to view and manage the list of participants (instructors and students) in the class, including their current conferencing status. It can also be used to mute/unmute individuals or all participants in an OrasiLabs Class Conference.
If enabled for the class, Chat is also available from the Participants option.
Was this article helpful?
That’s Great!
Thank you for your feedback
Sorry! We couldn't be helpful
Thank you for your feedback
Feedback sent
We appreciate your effort and will try to fix the article